Cultivation guide

Mushroom cultivation guide

Ideal conditions, practical tips, and warning signs for each species — the same content used inside CoguPlanner, available for reference before you start growing.

Overview

This guide brings together the recommended temperature, humidity, light, and ventilation conditions for each species, along with practical tips and warning signs observed during cultivation. Use it as a quick reference before starting a new block — to track your actual production, with shelves, blocks, and harvests organized, check out CoguPlanner.

Cultivation stages

The same phases apply to nearly every species — what changes is the timing and ideal conditions for each one.

Phase 1
Colonization
The mycelium (the white "roots") spreads through the entire substrate of the block.
Phase 2
Induction
A change in the environment — more air, light, and humidity — to trigger fruiting.
Phase 3
Pins
Small primordia, the future mushrooms, start to appear.
Phase 4
Fruiting
The mushrooms grow fast, nearly doubling in size each day.
Phase 5
Harvest
The ideal moment to cut, before the caps open too much.
Phase 6
Rest / new flush
The block rests and recovers for the next round of production.

Oyster

Brown shimeji mushroom

Brown shimeji mushroom

EasyGood for beginnersFast grower2–3 flushesVerified
Pleurotus ostreatus · Oyster mushroom

A fast-growing, beginner-friendly Pleurotus ostreatus type. It fruits across a relatively broad cool-to-mild temperature range and adapts well to sawdust- or straw-based cultivation systems.

Cultivation profile

Ranges are estimates and vary with strain, substrate, block size, spawn rate, and fruiting setup.

Incubation

Temperature
18–24 °C ideal16–28 °C allowable
Humidity
60–75% room RH
Light
None
CO₂
High CO₂ tolerated
Colonization
13–21 daysTypical 16 days

Pinning & fruiting

Temperature
14–20 °C ideal10–24 °C allowable
Humidity
85–95% RH
Light
Bright indirect
Fresh air
High
CO₂
Preferred <800 ppmRecommended max 1000 ppm
Induction to pins
3–10 daysTypical 6 days
Pins to harvest
3–8 daysTypical 5 days

Substrate

PrimarySterilized supplemented hardwood sawdust, commonly with supplements such as wheat bran, rice bran, or soy hulls.
SecondaryPasteurized cereal straw, such as wheat, oat, or rye straw.

Harvest cues

Inspect daily.
Harvest whole clusters when the caps are almost flat.
The cap edges should still be slightly curled downward.
Harvest before the caps become strongly upturned and before heavy spore release.

Advanced notes

Allow the block to rest for about 7–14 days between flushes.
Most blocks produce 2–3 flushes under good conditions.
Rehydrate only as needed between flushes; avoid waterlogging the block.
Strong fresh-air exchange during fruiting helps produce better cap shape and shorter stems.

Practical tips

Keep humidity high without soaking the block.
Use bright indirect or diffuse light; avoid hot direct sunlight.
Maintain strong fresh-air exchange during fruiting.
Use misting or ambient humidification appropriate to the setup; do not keep developing mushrooms continuously wet.
Check color, smell, texture, and moisture every day.
Use maturity and harvest cues, not a fixed calendar interval, to decide when to pick.

Warning signs

Expanding green mold or green powder
Likely Trichoderma or another green mold contamination. Isolate the block immediately and follow the cultivation area's contamination protocol.
Sour or rotten odor with wet or slimy areas
Possible bacterial or anaerobic contamination. Isolate the block and inspect for wet, slimy, or discolored tissue.
Long stems with small caps
Usually indicates excessive CO₂ or insufficient fresh-air exchange. Increase ventilation and verify adequate diffuse light.
Dry surface, shriveled pins, or stalled pinning
Usually indicates low relative humidity and/or insufficient block hydration. Correct humidity and assess hydration without waterlogging the substrate.
Black fuzzy or powdery growth
Possible mold contamination. Isolate and inspect closely; do not classify normal dark cap coloration as contamination by color alone.
Caps fully flat or strongly upturned
The harvest window is closing. Harvest promptly before quality declines and heavy spore release begins.
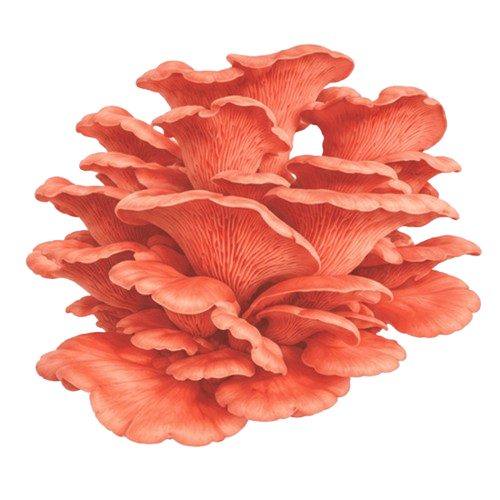
Pink oyster mushroom

Pink oyster mushroom

EasyGood for beginnersFast grower2–3 flushesVerified
Pleurotus djamor · Pink oyster

A warm-fruiting pink oyster in the Pleurotus djamor complex. It colonizes suitable lignocellulosic substrates quickly, fruits best in warm, humid, well-ventilated conditions, and is notably perishable after harvest.

Cultivation profile

Ranges are estimates and vary with strain, substrate, block size, spawn rate, and fruiting setup.

Incubation

Temperature
24–28 °C ideal20–32 °C allowable
Humidity
80–90% room RH
Light
None
CO₂
Colonization
10–30 daysTypical 14 days

Pinning & fruiting

Temperature
22–30 °C ideal20–35 °C allowable
Humidity
85–90% ideal RH75–95% allowable RH
Light
Ambient
Fresh air
High
CO₂
Preferred <800 ppmRecommended max 1000 ppm
Induction to pins
2–8 daysTypical 5 days
Pins to harvest
3–5 daysTypical 4 days

Substrate

PrimaryPasteurized or otherwise properly heat-treated rice/paddy straw. This is the strongest primary substrate recommendation across the cultivation studies reviewed.
SecondaryOther properly prepared cereal straws, including finger-millet, sorghum, and corn straw, can support productive cultivation.
SecondaryProperly prepared sugarcane bagasse can support fruiting, although colonization speed varies substantially with formulation and spawn rate.
SecondaryProperly prepared coir pith can be colonized and fruited, but published results show slower colonization and lower yield than the best straw substrates.
SecondaryHardwood-sawdust blends can support cultivation, but some tested sawdust-containing formulations colonized considerably more slowly than rice straw.

Harvest cues

Look for well-developed pink clusters with wavy caps whose margins are still curved slightly downward.
Harvest when the cap margins are still slightly down-curled or have just begun to flatten, before they turn strongly upward.
Do not wait for heavy visible spore release. Upturned caps and accumulating white spores indicate that the ideal harvest window is passing.
Pink coloration commonly fades or darkens as the mushrooms mature. Harvesting while the color is still vivid generally corresponds to a younger fruit body.

Advanced notes

Pink oyster is a genuinely warm-fruiting Pleurotus. It is a poor choice for persistently cool fruiting rooms; prolonged cold slows development and sufficiently cold conditions can stall fruiting.
Color fading with maturity is normal and should not be treated as contamination by itself. Young caps are usually more vividly pink; older caps may become paler, duller, or darker.
Fresh Pink Oyster is highly perishable. Published work reports a shelf life of about 24 hours at ambient temperature, so rapid cooling and prompt use or sale are important.
Spawn-run time is strongly substrate- and spawn-rate-dependent. Favorable straw systems can colonize in roughly 10–15 days, while some sawdust or bagasse formulations can take several weeks longer.
Routine soaking between flushes is not established as a species requirement. Published Pink Oyster crops produced later flushes without a prescribed immersion step, so rehydration should be based on actual substrate moisture loss and the production system.

Practical tips

Maintain strong fresh-air exchange during fruiting. Accumulated CO₂ quickly degrades Pink Oyster cap-to-stem proportions.
Provide regular diffuse or ambient light during fruiting rather than keeping the crop dark. Light level influences normal fruit development and can affect color expression.
Keep humidity especially high while pins are initiating, then maintain high humidity without saturating developing clusters.
Control room humidity rather than keeping pins and caps continuously wet. Direct misting is setup-dependent; avoid spraying mature mushrooms immediately before harvest.
Inspect developing clusters at least daily and more frequently near maturity. Pink Oyster can move from an ideal harvest stage to overmature very quickly.
Between flushes, restore substrate moisture only when the block has actually dried. Avoid automatic soaking or waterlogging.

Warning signs

Expanding green mold or green powder
Likely Trichoderma or another green mold contamination. Isolate the affected block promptly and follow the cultivation area's contamination protocol.
Fast-spreading orange or pink powder on the substrate
A powdery orange-to-pink colony spreading across substrate can indicate Neurospora or another mold. This is different from the normal smooth pink, salmon, or orange-pink tissue of Pink Oyster fruiting bodies.
Sour odor with wet or slimy substrate
Possible bacterial wet spot, sour rot, or another bacterial problem. Isolate the block and inspect for excessively wet, gray, slimy, or uncolonized areas.
Long stems with unusually small caps
This is a strong sign of excessive CO₂ or inadequate fresh-air exchange in Pink Oyster. Increase ventilation and verify that exhaust and air movement are functioning correctly.
Growth stalls in a cool fruiting room
Pink Oyster is a tropical, warm-fruiting species. Persistently cool conditions can slow or stall pin and fruit-body development; verify fruiting temperature before treating the block as failed.
Pins dry, shrivel, or stop developing
Check relative humidity, substrate hydration, and excessive drying airflow. Maintain high humidity without leaving the developing clusters continuously wet.
Caps strongly upturned with visible spore release
The cluster is becoming overmature. Harvest promptly; color, texture, and post-harvest quality decline quickly after the optimal harvest stage.
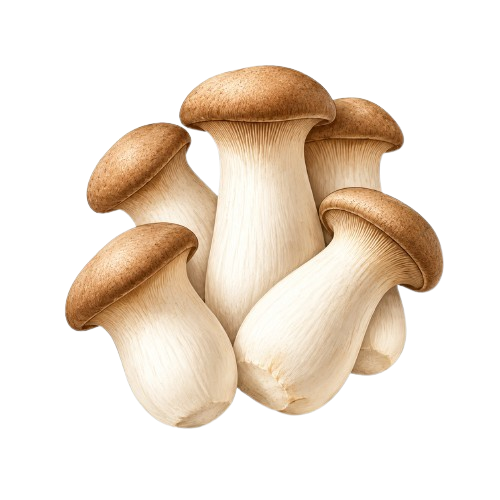
King oyster mushroom

King oyster mushroom

Intermediate1–2 flushesVerified
Pleurotus eryngii · King oyster

A cool-fruiting Pleurotus cultivated mainly on supplemented sawdust- or corncob-based bottles and blocks for its thick, firm stipe and compact brown cap. Its production cycle is generally slower and more environment-sensitive than common oyster mushrooms, making stable temperature, humidity, light, ventilation, and stage-specific CO₂ management especially important.

Cultivation profile

Ranges are estimates and vary with strain, substrate, block size, spawn rate, and fruiting setup.

Incubation

Temperature
23–25 °C ideal20–30 °C allowable
Humidity
60% room RH
Light
None
CO₂
Colonization
14–35 daysTypical 30 days

Pinning & fruiting

Temperature
12–17 °C ideal10–20 °C allowable
Humidity
85–90% RH
Light
Ambient
Fresh air
Moderate
CO₂
Induction to pins
7–10 daysTypical 9 days
Pins to harvest
7–10 daysTypical 8 days

Substrate

PrimarySterilized sawdust- and/or corncob-based substrate, commonly supplemented with wheat or rice bran and/or soybean or maize meal, with mineral amendments as required by the formulation.
SecondaryTreated cereal straw such as rice, wheat, maize, or sorghum straw. Colonization speed and yield vary strongly with straw type, supplementation, bag size, and spawn rate.

Harvest cues

Inspect developing fruit bodies daily once primordia are established.
Target fruit bodies with a thick, firm, well-shaped stipe and no softening or water-soaked tissue.
Harvest at the intended market grade: intensive bottle production often favors a compact to partly expanded cap, while some bag-culture systems harvest closer to a flat cap with slightly upturned margins.
Harvest before overmaturity and heavy basidiospore release.

Advanced notes

CO₂ management is stage-specific in commercial King Oyster production. Published protocols use very different concentrations during primordia formation, stipe shaping, and later fruit-body development, so one whole-fruiting ppm ceiling is not biologically defensible.
High humidity supports initiation, but published bottle systems commonly taper relative humidity as fruit bodies develop; this can improve keeping quality and help reduce bacterial soft-rot risk.
Colonization time changes substantially with strain, substrate, supplementation, spawn rate, container size, and production method. Research systems range from very rapid straw colonization to runs longer than seven weeks on some agro-residue formulations.
In intensive bottle systems, thinning can retain one strong fruit body for a larger and more uniform market grade. It is a commercial shaping technique, not a biological requirement.
A casing overlay can increase yield in some supplemented-substrate systems, but casing is not mandatory for all King Oyster production methods.
Intensive factory production commonly takes one commercial flush, while longer bag or agro-residue systems can produce a second flush.
Do not assume a universal between-flush soak. Rehydration is method-specific, and many one-flush bottle systems do not use a recovery cycle.

Practical tips

Provide a cool, stable fruiting environment; temperature strongly affects pinning speed, morphology, yield, and quality.
Keep colonizing bags or bottles in darkness or near-darkness until the substrate is fully colonized.
Provide regular cultivation-room light for primordia and fruit-body development; light quality and intensity affect yield and morphology.
Keep relative humidity high during initiation, then reduce it moderately as mushrooms enlarge rather than keeping fruit-body surfaces continuously wet.
Use ventilation and CO₂ monitoring according to the desired morphology and cultivation stage rather than copying ordinary-oyster CO₂ limits.
Near harvest, check cap expansion, stipe firmness, surface moisture, odor, and abnormal growth every day.

Warning signs

Expanding green mold or green powder
Likely Trichoderma or another competitor mold. Isolate the block or bottle immediately and follow the cultivation area's contamination protocol.
Water-soaked lesions or soft rot
Possible bacterial soft rot, including Pantoea-associated disease reported in Pleurotus eryngii. Isolate affected units and inspect for soft, wet tissue and abnormal odor.
Persistent surface wetness, browning, or slimy tissue
Excess condensation or sustained surface wetness increases bacterial and quality-loss risk. Correct humidification and airflow without drying the substrate.
Severe elongation or malformed growth beyond the target shape
King Oyster naturally forms a thick stem and relatively small cap, and commercial growers may intentionally raise CO₂ to shape the stipe. If growth becomes severely distorted, weak, lumpy, or poorly differentiated, verify the stage-specific CO₂ and ventilation settings.
Delayed pinning, dry primordia, or stalled growth
Often associated with unsuitable temperature and/or insufficient humidity. Correct the fruiting environment without soaking developing fruit bodies.
Caps overexpanded or releasing spores
The target harvest window is closing. Harvest promptly when the intended market grade is reached and before quality declines.

Gourmet

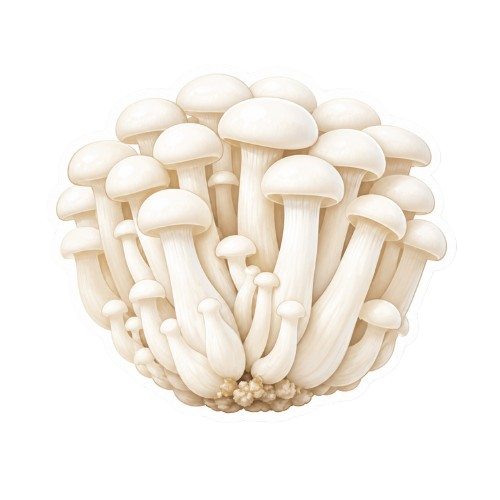
White Shimeji

White Shimeji

Intermediate1–2 flushesVerified
Hypsizygus marmoreus · White beech mushroom

A white commercial form of Hypsizygus marmoreus grown in compact clusters. It is a slow, cool-fruiting mushroom with a long maturation period before fruiting, so it needs more temperature, humidity, air-exchange, and timing control than fast-growing oyster mushrooms.

Cultivation profile

Ranges are estimates and vary with strain, substrate, block size, spawn rate, and fruiting setup.

Incubation

Temperature
22–25 °C ideal20–26 °C allowable
Humidity
70–75% room RH
Light
None
CO₂
Preferred <3500 ppmRecommended max 4000 ppm
Colonization
30–40 daysTypical 35 days

Pinning & fruiting

Temperature
12–17 °C ideal11–18 °C allowable
Humidity
95–98% ideal RH90–99% allowable RH
Light
Low indirect
Fresh air
High
CO₂
Preferred <1000 ppmRecommended max 1500 ppm
Induction to pins
10–14 daysTypical 13 days
Pins to harvest
9–10 days

Substrate

PrimarySterilized hardwood sawdust or beech-based substrate supplemented with nutrient-rich materials such as wheat bran, rice bran, or corn flour. Commercial formulas commonly combine sawdust with other lignocellulosic ingredients.
SecondarySterilized corn-cob and sawdust mixtures supplemented with wheat or rice bran. Cottonseed hulls and other clean lignocellulosic agricultural by-products can also be used in validated formulations.

Harvest cues

Harvest when the cluster is dense, uniform, and still holds a compact commercial shape.
The caps should remain small and convex to hemispherical rather than broadly flattened. Commercial strains commonly finish with caps around 1–2 cm, although exact size varies by cultivar.
Stems should be firm, upright, and well formed, without soft, water-soaked, or collapsing tissue.
Pick before the caps spread widely or the cluster begins to loosen; morphology is a better maturity cue than a fixed calendar day.

Advanced notes

Full substrate colonization is not the same as fruiting readiness. Hypsizygus marmoreus normally requires a long physiological maturation or after-ripening period, and total pre-fruiting culture commonly extends to roughly 80–110 days or more depending on strain and production system.
Commercial white strains are often managed with staged temperatures: a recovery phase around 16–18 °C, primordia induction around 12–14 °C, and later fruit-body development around 15–17 °C.
Commercial bottle cultivation commonly scratches or removes the aged surface mycelium and replenishes water before the first fruiting cycle. This is a first-fruiting induction practice, not evidence for routine soaking between later flushes.
White shimeji is light-responsive during fruiting. Low-intensity controlled light supports primordia and normal cap development; blue-rich light has performed particularly well in experimental work.
Industrial bottle systems usually harvest one flush and then remove the spent substrate. Some alternative cultivation systems report a second flush, but repeated flush production is not the commercial default.
White Hypsizygus marmoreus strains are generally more cultivation-sensitive than brown strains and should not be treated as a fast or beginner-oriented species.

Practical tips

Do not trigger fruiting as soon as the substrate first looks fully white. Allow the strain-specific maturation period required for physiological fruiting readiness.
Keep fruiting cool and maintain very high air humidity, especially during recovery and primordia formation, without saturating the developing mushrooms with standing water.
Use strong fresh-air exchange after fruiting induction and monitor CO₂. For a general guide, aim for about 1000 ppm or less when possible and keep it around or below 1500 ppm during fruit-body development.
Provide low, diffuse light during pinning and development. Complete darkness or unsuitable light can reduce primordia formation and distort development.
Humidify the air without leaving caps and stems continuously wet. Persistent water films increase bacterial-disease risk in dense, high-humidity fruiting rooms.
Harvest the compact cluster as a unit once the target morphology is reached, then trim the substrate base cleanly.

Warning signs

Yellow, water-soaked, sticky lesions on stems
A high-priority bacterial-disease sign. White Hypsizygus marmoreus has documented brown blotch caused by Pseudomonas tolaasii, beginning with yellow or water-soaked sticky tissue and progressing to brown blotching, rot, and odor. Isolate affected material and review sanitation and surface-wetness control.
Expanding green mold or green powder
Treat expanding green sporulation on the substrate or cluster as contamination rather than normal white-shimeji coloration. Isolate the unit and prevent spores from spreading through the fruiting room.
Aerial mycelium develops but primordia do not
This can indicate an incomplete fruiting trigger, especially inadequate suitable light after surface scratching or insufficient stage change. Confirm physiological maturity, temperature shift, light, humidity, and fresh-air conditions.
Caps stay suppressed while stems develop abnormally
Excessive CO₂ can inhibit normal cap development. Increase fresh-air exchange and verify the sensor and airflow before allowing CO₂ to remain elevated. Some industrial systems intentionally manipulate CO₂ for shape, but that should not be used as a generic target.
Dry, shrinking, or stalled primordia
Developing white shimeji normally requires very high relative humidity. Drying or stalled pins can indicate low RH, excessive drying airflow, or insufficient substrate moisture. Correct humidity without soaking the fruit bodies.
Caps are spreading broadly and the cluster is loosening
The preferred commercial harvest stage has compact clusters with small convex caps. Broadly spreading caps indicate the harvest window is being passed and market quality may decline.
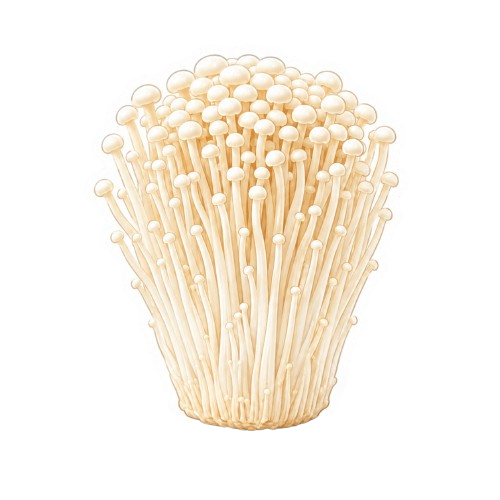
Enoki

Enoki

Advanced1–2 flushesVerified
Flammulina filiformis · Enokitake

A cold-fruiting cultivated Flammulina filiformis grown for long, slender stems and compact caps. Incubation is relatively mild, but consistent production requires staged cooling, high humidity, low-intensity light after initiation, and deliberate CO₂ and airflow control, making it an advanced crop.

Cultivation profile

Ranges are estimates and vary with strain, substrate, block size, spawn rate, and fruiting setup.

Incubation

Temperature
18–25 °C ideal15–25 °C allowable
Humidity
65–80% room RH
Light
None
CO₂
Preferred <3000 ppmRecommended max 5000 ppm
Colonization
20–30 daysTypical 25 days

Pinning & fruiting

Temperature
8–14 °C ideal3–16 °C allowable
Humidity
85–95% ideal RH75–98% allowable RH
Light
Low
Fresh air
Low
CO₂
High CO₂ tolerated
Induction to pins
6–14 daysTypical 10 days
Pins to harvest
13–15 daysTypical 14 days

Substrate

PrimarySterilized hardwood or broadleaf sawdust supplemented with materials such as wheat bran or rice bran; modern bottle formulas may also include cottonseed hulls and mineral amendments.
SecondarySterilized lignocellulosic mixes using validated proportions of materials such as corncob, cottonseed hull, soybean or rice straw, rice or wheat bran, and similar agricultural residues.

Harvest cues

Harvest when most stems reach about 14–18 cm in the selected system; modern white commercial strains are often harvested around 15–16 cm.
Target long, slender stems with small compact caps at the beginning of pileus expansion rather than waiting for broad cap opening.
Harvest while the cluster remains firm and upright and stem and cap development are reasonably uniform for the target grade.
For normally white cultivars, new stem browning is a late-age and quality-loss cue. Do not confuse this with the natural color of golden or yellow cultivars.

Advanced notes

Enoki fruiting is staged. Induction commonly uses about 10–16 °C, followed by colder growth-control or elongation stages that may reach about 3–8 °C before final development. The guide's 8–14 °C value is a compact summary, not one fixed setpoint.
Commercial Enoki intentionally uses elevated CO₂. A controlled study found much smaller caps at 10,000 ppm than at 1,000 ppm, and industrial cultivation uses stage-specific CO₂ management to preserve the long-stem, small-cap form.
Bottle systems commonly add a paper or plastic collar after the young fruit bodies rise above the bottle mouth to guide vertical growth and preserve the desired microclimate.
Bag or small-scale systems can produce a second flush about 15 days after the first, while many factory bottle systems harvest only one commercial flush for throughput.
Maintain suitable substrate moisture after harvest, but species-specific evidence does not support one universal soaking protocol between flushes.

Practical tips

Incubate in darkness. Full substrate colonization commonly takes about 20–30 days, depending on strain, substrate, inoculation rate, and container.
After full colonization, surface scraping and leveling are commonly used in bottle or bag systems to synchronize recovery and primordia formation.
Use a deliberate cold-induction step; primordia commonly appear about 6–14 days after stimulation when the culture is physiologically ready.
Fruit-body initiation can begin in darkness, but provide low-intensity light for continued development; avoid hot direct sunlight.
Use controlled air movement rather than oyster-style high fresh-air exchange. Enoki morphology depends on elevated CO₂, with short aeration periods used during specific growth-control stages.
Maintain high relative humidity without keeping young clusters continuously wet. Excessive surface moisture, especially with warmth, can favor bacterial disease.
For bottle production, add the collar or sleeve at the appropriate early stem-growth stage if the target is the classic long, straight commercial Enoki form.

Warning signs

Expanding yellow-brown spots, pitting, or deformed caps
Irregular pale-yellow to light-brown spots that enlarge, become pitted, or deform the pileus can indicate bacterial brown blotch. Isolate affected containers and review hygiene, temperature, humidity, and surface-wetness control.
Water-soaked lesions, soft tissue, collapse, or foul odor
Water-soaked tissue that browns, softens, collapses, or develops a foul odor is consistent with bacterial rot or blight. Isolate affected material and inspect sanitation and moisture management.
Fast-spreading mold distinct from normal white Enoki mycelium
Foreign fuzzy, powdery, or strongly colored growth spreading independently of the normal mycelium can indicate contamination. Isolate the container and review substrate sterilization and inoculation hygiene.
No primordia after the expected cold-induction window
If primordia do not form after roughly 10–14 days of appropriate induction, verify culture maturity, surface preparation, temperature, substrate moisture, and strain-specific requirements before extending the schedule.
Caps enlarge while stems remain below the target commercial form
If the goal is classic long-stem Enoki, early broad cap expansion can indicate that CO₂, the collar, temperature staging, or air exchange is not producing the intended morphology. Do not treat elevated CO₂ itself as a defect in this species.
Very soft, weak, or overly rapid slender growth
Rapid growth at the warmer end of the fruiting range can produce softer, lower-quality fruit bodies. Verify the cold growth-control stage and the protocol's short controlled aeration periods.
New browning on a normally white cultivar near harvest
New stem or cap browning in a white cultivar can signal aging or declining market quality. Golden and yellow Enoki cultivars are naturally pigmented, so color alone is not a contamination diagnosis.
Paddy straw mushroom

Paddy straw mushroom

EasyGood for beginnersFast grower2 flushesVerified
Volvariella volvacea · Straw mushroom · Chinese mushroom

A fast-growing tropical Volvariella cultivated on rice straw and other high-cellulose agricultural residues. It needs genuinely warm conditions, colonizes in only a few days, and is normally harvested at the button or egg stage before the volva opens.

Cultivation profile

Ranges are estimates and vary with strain, substrate, block size, spawn rate, and fruiting setup.

Incubation

Temperature
30–35 °C ideal
Humidity
75–85% room RH
Light
None
CO₂
Colonization
4–6 daysTypical 5 days

Pinning & fruiting

Temperature
28–32 °C ideal25–35 °C allowable
Humidity
80–90% ideal RH75–90% allowable RH
Light
Ambient
Fresh air
Moderate
CO₂
Low
Induction to pins
Pins to harvest
4–5 days

Substrate

PrimaryFresh, mold-free rice or paddy straw, soaked, drained and prepared according to the chosen bed, block or compost method. This is the traditional primary substrate for Volvariella volvacea.
SecondaryCotton ginning or spinning waste, commonly prepared as cotton-waste compost. ICAR cultivation literature reports earlier fruiting and generally more stable or higher yields than paddy straw alone in some production systems.
SecondaryOther high-cellulose agricultural residues documented for this species include wheat straw, banana leaves, sugarcane bagasse, water hyacinth and oil-palm residues. Performance depends strongly on preparation, formulation and local method.

Harvest cues

Harvest at the button or egg stage rather than waiting for a fully expanded cap.
The preferred harvest window is before the universal veil/volva breaks or just after rupture, while the mushroom is still compact.
Do not wait for the cap to open broadly. Open fruit bodies become more fibrous and have passed the preferred commercial maturity stage.
Check the crop several times per day near maturity. Under warm conditions the mushrooms develop rapidly and can pass the ideal harvest stage within hours.

Advanced notes

This is a genuinely warm-climate mushroom. Mycelial growth is strongest around 30–35 °C, with approximately 32 °C repeatedly identified as a strong center point in technical guidance; fruiting is also conducted warm, commonly around 28–32 °C.
The species has a very short production cycle. Intensive methods can fully colonize suitable substrate in roughly 4–6 days, and the first harvest is commonly reached around 9–10 days after spawning in well-managed systems.
Production is strongly front-loaded. Technical guidance describes a first flush lasting about three days and contributing roughly 70–90% of total yield, followed by a smaller second flush contributing the remaining 10–30%.
A recovery interval of about 3–5 days is described between the first and second flush. Restore moisture and favorable room conditions during this period, but do not convert this into a universal requirement to immerse or soak the entire bed or block.
Bulk substrate moisture is separate from room relative humidity. Around 60–65% substrate moisture is a strong technical reference; experimental work found 60% best among tested whole-bed moisture levels, while fully saturated substrate failed to fruit.
Fruiting requires good oxygen supply and low CO₂ relative to spawn run. A peer-reviewed controlled cultivation study maintained CO₂ below 1200 ppm, but this should be treated as a published protocol rather than a universal species-level ceiling; the static ppm fields therefore remain unset.
Fresh paddy straw mushrooms are highly perishable and chilling-sensitive. Post-harvest research reports only about 1–2 days of shelf life for untreated controls, while technical guidance warns of autolysis/chilling damage at ordinary 4 °C refrigeration. Plan rapid post-harvest handling and use a validated storage protocol.

Practical tips

Do not manage this species like a cool-fruiting oyster. Maintain a genuinely warm crop environment and avoid prolonged cool conditions during active growth and fruiting.
Keep the early spawn run dark or near-dark with limited ventilation while the substrate colonizes.
As the spawn run finishes, introduce regular cultivation-room light and increase fresh-air exchange for primordia and fruit-body development.
Maintain room humidity with fine misting appropriate to the setup. Prefer humidifying the room, floor or walls instead of heavily wetting young primordia; direct bed misting should be light and only used when the substrate surface is actually drying.
Use fresh, clean raw material and healthy spawn. Match pasteurization or conditioning to the cultivation method, because inadequate treatment strongly increases competitor molds, Coprinus and pest problems.
Harvest by gently lifting and twisting the whole fruit body from the substrate. Do not leave a cut stalk base behind, because residual tissue can rot and become a focus for pests and molds.

Warning signs

Expanding green mold or green sporulation
Likely competitor mold such as Trichoderma. Isolate the affected bed or block and review substrate pasteurization, spawn cleanliness and sanitation before continuing the crop.
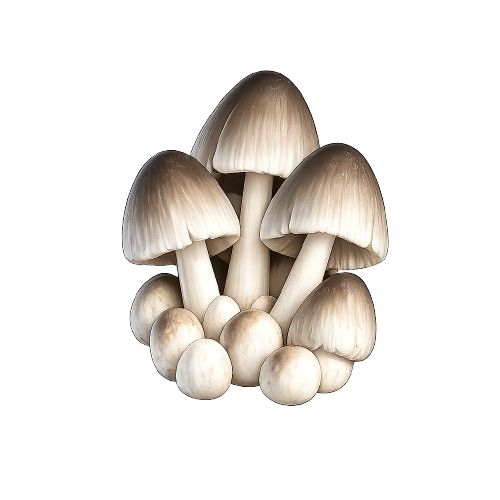
Ink-cap mushrooms or black inky residue
Coprinus is a major competitor of paddy straw mushroom. Its fruit bodies can open and autodigest into black inky material. Excess nitrogen, poor-quality straw, excessive substrate heat or overly wet/poorly conditioned compost can favor it.
Strong ammonia smell from the substrate
A strong ammonia odor points to excessive nitrogen or incomplete compost conditioning. Do not treat it as normal mushroom aroma; correct the substrate preparation problem before relying on the bed for a clean crop.
Young mushrooms aborting or dying
Possible causes include insufficient oxygen, excessive CO₂, sharp temperature fluctuations, pests, degraded spawn or disease. Increase diagnostic checks rather than assuming low humidity is the only cause.
Mycelium drying or surface growth stalling
Usually indicates insufficient water availability and/or excessive ventilation. Restore moisture carefully without saturating the substrate or suffocating young primordia.
Volva fully open and cap expanding
The preferred button/egg harvest window has passed. Harvest promptly; opened fruit bodies become more fibrous and lose the compact market stage.
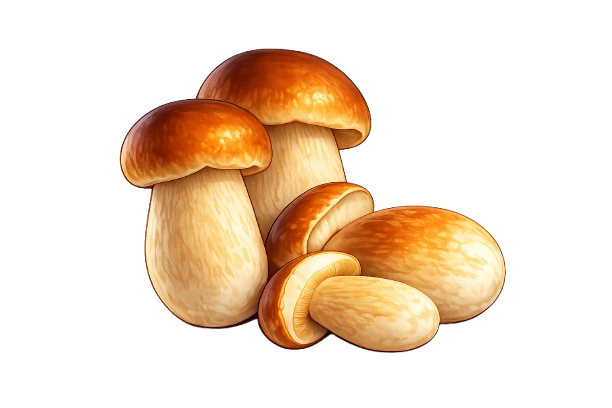
Porcini

Porcini

AdvancedVerified
Boletus edulis · Cep

A highly valued ectomycorrhizal bolete that depends on a living plant partner through its roots. Researchers can establish Boletus edulis mycorrhizae on compatible seedlings, but the reviewed evidence does not establish a reproducible controlled fruiting cycle comparable to block-grown mushrooms. Treat Porcini as a living-host field or orchard system, not an indoor substrate-block crop.

Cultivation profile

Ranges are estimates and vary with strain, substrate, block size, spawn rate, and fruiting setup.

Incubation

Temperature
Humidity
Light
CO₂
Colonization

Pinning & fruiting

Temperature
Humidity
Light
Fresh air
CO₂
Induction to pins
Pins to harvest

Substrate

PrimaryPrimary host system — the living root zone of a compatible ectomycorrhizal tree or shrub in a suitable soil environment. This is not a detached sawdust, straw, monotub, or cut-log substrate.

Harvest cues

Younger fruit bodies have a hemispherical, bun-like cap that expands and becomes flatter with age.
The pore surface is white and 'stuffed' when young, then opens and becomes yellowish as the fruit body matures.
Younger Boletus edulis has white, firm flesh in the cap and stipe; use firmness together with cap and pore maturity when assessing the harvest window.
Olive-yellow to brownish pore coloration and a more expanded cap indicate advancing maturity. Use morphology rather than a fixed number of days to decide when to harvest.

Advanced notes

Boletus edulis is ectomycorrhizal and depends on a living plant partner connected through the root system. Its cultivation model is fundamentally different from saprotrophic block mushrooms.
Successful formation of B. edulis ectomycorrhizae on a seedling does not prove that the system will produce mushrooms. Mycorrhization and reproducible fructification are separate milestones.
Research has observed or assessed B. edulis ectomycorrhizae about four to five months after inoculating living seedlings. This is a root-colonization research checkpoint, not a commercial spawn-run, pinning, or harvest duration.
Do not convert laboratory culture conditions or local forest climate observations into universal incubation or fruiting-room temperature, RH, light, fresh-air, or CO2 setpoints. The controlled block-style fields remain intentionally null.
B. edulis and related porcini associate with multiple ectomycorrhizal plant families, including pines, beeches/oaks, birches and other compatible hosts. Host compatibility remains fungus-, plant-, strain-, and site-dependent.
Field studies show that precipitation, soil water balance, soil structure, carbon availability, stand condition, and seasonal climate interact with B. edulis mycelium and sporocarp production. These factors cannot be reduced to one room-humidity target.
There is no defensible block-style flush count, fixed rest interval, or universal between-flush soaking protocol for the living-host Porcini system represented here.

Practical tips

Use accurately identified inoculum. 'Porcini' is a broader market/common-name group, so the label alone does not prove that material is Boletus edulis.
Work with a compatible living ectomycorrhizal host and treat host health as part of the mushroom-production system.
Verify that the target fungus has actually formed ectomycorrhizae on the host roots before treating an inoculation attempt as established.
Protect the host tree and its root zone. Avoid management that severely damages roots or removes the host on which the fungal network depends.
Monitor soil moisture, drainage, precipitation and seasonal water balance rather than trying to manage Porcini with an indoor room-RH setpoint.
Record host, site, rainfall, soil conditions and actual field fruiting events. Use observed local phenology rather than a fixed indoor crop calendar.

Warning signs

No compatible living-host association
Porcini is ectomycorrhizal. A detached sawdust, straw, monotub, or cut-log system without a compatible living host root network is not a supported Boletus edulis production model.
Target mycorrhiza is lost after out-planting
Experimental B. edulis associations can fail to persist after transfer from controlled conditions. Re-check the roots and do not assume that an initially successful inoculation remains established.
Host-tree cutting or severe root-zone disturbance
Field research found a strong decline in B. edulis soil mycelium after tree cutting. Protect the living host and root system instead of treating the fungus as independent of the stand.
Site water balance is unfavorable
Precipitation, soil water availability, drainage and related soil properties influence B. edulis ecology. Investigate field water conditions rather than correcting toward a generic indoor humidity percentage.
Mycorrhiza is present but mushrooms do not appear
Root mycorrhization is not the same as successful fructification. Do not classify this as a normal 'stalled pinning' problem or invent a pinning deadline.
Pore layer is olive-yellow to brown and the cap is expanding
The fruit body is moving into a more advanced maturity stage. This color change is a normal maturity cue, not mold contamination.

Medicinal

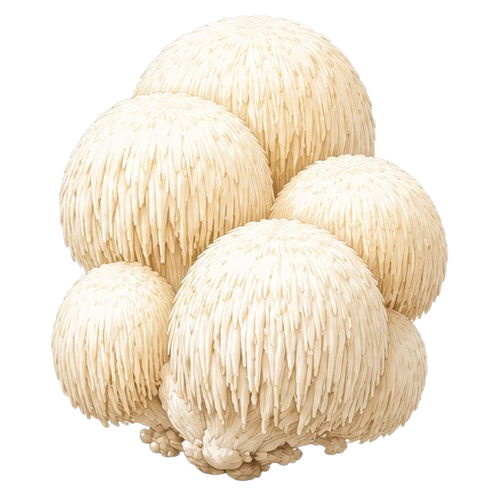
Lion's mane

Lion's mane

Intermediate2–3 flushesVerified
Hericium erinaceus · Monkey's head

A white, tooth-forming mushroom cultivated mainly on supplemented hardwood- or cottonseed-hull-based blocks. It fruits best in cool-to-mild, very humid conditions with low diffuse light and strong fresh-air exchange, while cultivation timing and temperature tolerance can vary substantially among strains.

Cultivation profile

Ranges are estimates and vary with strain, substrate, block size, spawn rate, and fruiting setup.

Incubation

Temperature
21–25 °C ideal20–30 °C allowable
Humidity
60–70% room RH
Light
None
CO₂
Colonization
21–35 daysTypical 28 days

Pinning & fruiting

Temperature
15–20 °C ideal12–24 °C allowable
Humidity
85–95% RH
Light
Low indirect
Fresh air
High
CO₂
Preferred <800 ppmRecommended max 1000 ppm
Induction to pins
3–7 daysTypical 5 days
Pins to harvest
4–7 daysTypical 5 days

Substrate

PrimarySterilized supplemented hardwood sawdust, commonly using hardwoods such as oak or beech with bran and mineral supplements.
SecondaryFormulated lignocellulosic agricultural-residue mixes, including cottonseed hulls, corncob and partial replacement with cereal or crop straws where the strain and recipe have been validated.

Harvest cues

Inspect developing fruit bodies daily as they approach maturity.
Harvest when the teeth or spines are clearly formed and elongated rather than still appearing as a smooth, compact mass.
The fruit body should still be firm and predominantly white to cream at harvest.
Harvest before widespread yellow-brown discoloration, softening, or drying indicates aging or declining quality.

Advanced notes

Humidity can be staged. A controlled study used about 95% RH for uniform primordia formation and then reduced it to about 85% RH during fruit-body development.
Temperature response is strongly strain-dependent. Most commercial references favor cool-to-mild fruiting, but selected warm-tolerant strains have been fruited successfully at approximately 23–26 °C; do not treat that warm range as universal.
Colonization and first-harvest timing vary substantially with substrate formulation, supplementation, spawn rate, container size and strain. Published substrate studies commonly place full colonization in roughly the low-20s to mid-30s days after inoculation.
Two flushes are well documented, and third-flush production has also been reported in controlled substrate studies. Commercial farms may stop earlier based on yield and economics.
Some strains can show a pinkish tint during early fruit-body development. Published observations show that this color may fade as the mushroom matures, so early pink coloration alone is not proof of contamination.
There is no well-supported universal rule requiring immersion between flushes. Restore substrate moisture only when needed and according to the block, substrate and farm protocol rather than automatically soaking every block.

Practical tips

Keep colonizing bags or bottles in dark conditions with normal filter-mediated gas exchange and stable incubation temperature.
Use a stable cool-to-mild fruiting environment for the generic profile; avoid assuming that a warm-selected strain represents all Lion's Mane cultures.
Provide low diffuse or indirect light during primordia and fruit-body development; bright direct light is unnecessary.
Maintain strong fresh-air management during fruiting and use CO₂ measurements when available. Aim below about 800 ppm when practical and keep the general recommended maximum near 1000 ppm.
Keep relative humidity high, especially during primordia formation, but manage the room rather than leaving the developing fruit body continuously saturated or dripping wet.
Check spine development, firmness, color, surface moisture and odor every day near harvest instead of relying only on a fixed calendar date.

Warning signs

Expanding green mold or green powder
Likely Trichoderma or another green mold contamination. Isolate the affected block promptly and follow the cultivation area's contamination protocol.
Water-soaked lesions, soft tissue, or spreading rot
Possible bacterial soft rot. Pantoea hericii was originally isolated from cultivated Lion's Mane fruiting bodies showing water-soaked lesions and soft-rot disease. Isolate affected material and review sanitation, surface wetness and environmental control.
Poorly formed body or sparse, abnormal spines
Environmental imbalance can disrupt normal tooth formation. Check CO₂ and fresh-air exchange first, then verify temperature, humidity and light; do not diagnose excessive CO₂ from morphology alone.
Spines drying, shriveling, or browning too early
Often indicates insufficient humidity, a drying air stream, or loss of substrate moisture. Correct the environment without soaking the fruit body or waterlogging the block.
Fruit body remains continuously wet or water-soaked
Persistent free water on the fruiting body raises quality and disease concerns. Adjust humidification, mist droplet size and airflow so high RH is maintained without continuous surface saturation.
Widespread yellow-brown color with softening
The harvest window is closing or quality is declining. Slight cream or limited yellowing can occur normally, but widespread discoloration together with softening or drying is a cue to harvest or inspect the environment.
Reishi

Reishi

Advanced2–3 flushesVerified
Ganoderma sichuanense · Lingzhi

A slow-fruiting medicinal polypore usually cultivated on supplemented hardwood sawdust or short hardwood logs. Reishi/Lingzhi forms hard, lacquered red-brown fruit bodies and needs a long, humidity-controlled fruiting period; ventilation and light strongly influence whether growth develops as antlers or broad conks.

Cultivation profile

Ranges are estimates and vary with strain, substrate, block size, spawn rate, and fruiting setup.

Incubation

Temperature
25–30 °C ideal21–30 °C allowable
Humidity
60–70% room RH
Light
None
CO₂
High CO₂ tolerated
Colonization
22–35 daysTypical 30 days

Pinning & fruiting

Temperature
25–28 °C ideal21–30 °C allowable
Humidity
85–95% ideal RH75–95% allowable RH
Light
Ambient
Fresh air
Moderate
CO₂
Induction to pins
10–28 daysTypical 14 days
Pins to harvest
15–35 daysTypical 25 days

Substrate

PrimarySterilized hardwood sawdust is the primary synthetic-block substrate, commonly supplemented with wheat bran, rice bran and/or other cereal supplements plus mineral amendments. Published bag protocols frequently target about 65% substrate moisture.
SecondaryShort hardwood logs or billets, including oak-, maple-, poplar- and other suitable broadleaf-wood systems. Log and buried-billet cultivation is well established but normally has a longer colonization and cropping cycle than synthetic bags.
SecondaryProperly formulated lignocellulosic agricultural materials can be used as partial or alternative substrates, including paddy straw and selected woody/agricultural residues. Colonization alone does not guarantee fruiting, so formulations should be validated before production-scale use.

Harvest cues

Watch the pale white-to-yellow growing band around the cap edge. A common maturity cue is when this active white margin narrows and finally disappears.
The pileus should be fully developed with the characteristic lacquered red to reddish-brown surface rather than a large actively growing pale edge.
Mature Reishi stops expanding rapidly and develops its characteristically hard, corky-to-woody texture.
Brown spore release is a normal maturity event. Harvest timing depends on whether the target product is the fruiting body itself or spore production; do not mistake normal Ganoderma spore dust for mold by color alone.

Advanced notes

The cultivated Asian Reishi/Lingzhi mushroom was historically called Ganoderma lucidum, but true G. lucidum sensu stricto is a different European species. Current taxonomic treatment used by this guide is Ganoderma sichuanense, with G. lingzhi retained as a widely used synonym and G. lucidum as a historical commercial name.
Some supplemented-sawdust protocols keep fully colonized bags for an additional maturation period before opening or fruiting. One peer-reviewed protocol used 7 additional days. Do not add this consolidation time to the colonization field unless the production workflow models it separately.
Reishi morphology is strongly controlled by ventilation, CO₂ and light. Restricted ventilation and elevated CO₂ favor elongated antler-type growth; greater air exchange and appropriate light promote pileus expansion into the classic kidney- or shelf-shaped conk. Antler growth is not contamination and can be an intentional production target.
Synthetic sawdust bags can fully colonize in a few weeks, while short-log or buried-billet systems may require 45–60 days or more before placement and can run for several months. Keep guide timing method-aware.
Second and third flushes are biologically possible and are reported in both research and extension systems, but yield commonly declines with later flushes. Some commercial growers take only one main bag flush, while older references report as many as four harvests under specific systems.
There is no well-supported universal rule to soak every Reishi block between flushes. Rehydration should depend on block moisture and the cultivation system; unnecessary soaking can increase contamination risk.

Practical tips

Incubate supplemented blocks warm and dark. Keep the substrate correctly hydrated and allow filtered gas exchange rather than opening the bag during spawn run.
Maintain high fruiting-room humidity, especially around primordium formation, while avoiding continuously water-soaked fruiting surfaces and standing water around the block.
Provide regular low-to-moderate diffuse or ambient light during primordium and fruit-body development. Light quantity and quality affect normal differentiation and final morphology.
Decide whether the crop target is antler-type or broad conk-type Reishi before setting ventilation. For classic conks, provide regular fresh-air exchange; intentionally restricted ventilation can drive antler formation.
Inspect the growing margin and cap surface regularly near maturity. The disappearing pale margin and onset of spore release are more useful harvest signals than a fixed calendar date.
Remove or isolate units that develop spreading competitor molds, fruit-body rot or abnormal odors. Green mold disease can damage both the colonized substrate and mature Reishi fruiting bodies.

Warning signs

Green mold, pale lesions, or rotting fruit bodies
Trichoderma species cause documented green mold disease in cultivated Lingzhi/Reishi. Early lesions can progress to white-to-green colonies, tissue discoloration, rot and withering. Isolate affected units promptly and follow the cultivation area's contamination protocol.
Rapid orange-red powdery mold on the substrate
Rapidly spreading orange-red spore masses can indicate Neurospora or another competitor mold rather than normal Reishi pigmentation. Treat fast powdery colony expansion across the substrate as contamination and isolate the unit.
Persistent antler growth when broad conks are intended
Antler-shaped Reishi is a real environmental morphology and is not automatically a defect. If broad pileus formation is the target, persistent antlers usually indicate that ventilation/CO₂ and light are still favoring elongated growth; adjust those variables gradually and verify the production target.
Primordia dry, stall, or fail to expand
Check fruiting humidity, substrate hydration, temperature and excessive drying airflow. Reishi primordia are commonly produced under high relative humidity; correct the room environment without leaving the developing tissue continuously soaked.
Heavy brown spore deposition after the target harvest stage
Brown powder around a mature Reishi can be normal basidiospores, not contamination. If the target is the fruiting body rather than spore collection, heavy ongoing sporulation means the common mature harvest window has been reached or passed; harvest according to the intended product.
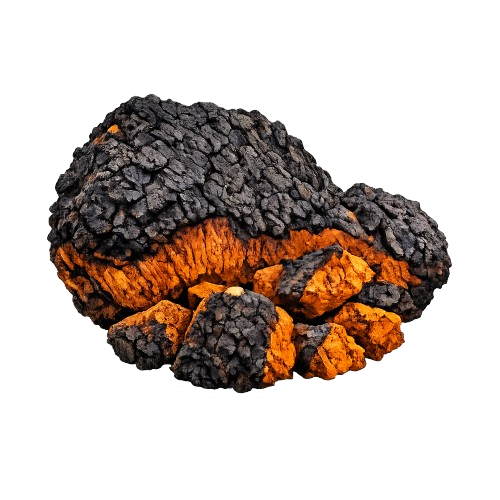
Chaga

Chaga

AdvancedVerified
Inonotus obliquus · Chaga fungus

A very slow-growing medicinal polypore cultivated unlike ordinary mushrooms. Chaga forms a sterile, charcoal-black conk on a living host tree—most reliably birch—over years, so its production is advanced forestry-style cultivation rather than a normal indoor pinning and flush cycle.

Cultivation profile

Ranges are estimates and vary with strain, substrate, block size, spawn rate, and fruiting setup.

Mycelial culture

Temperature
25–30 °C ideal
Humidity
Light
CO₂
Colonization

Conk development

Temperature
Humidity
Light
Fresh air
CO₂
Induction to pins
Pins to harvest

Substrate

PrimaryPrimary — living birch (Betula spp.). Field cultivation has been demonstrated on species including Betula pendula, B. pubescens, and B. platyphylla var. japonica. The goal is controlled infection of a living host, not fruiting from a detached block.
SecondarySecondary / laboratory use — sterile agar, liquid media, grain, or birch-based inoculum can be used to grow mycelium and prepare spawn. This produces inoculum or mycelial biomass and must not be presented as equivalent to a tree-grown chaga conk.

Harvest cues

For a chaga-conk crop, confirm that the conk is on a living host tree. The normal harvested chaga stage is associated with the living-host phase, not the post-mortem sexual fruiting stage.
Look for the characteristic hard, irregular, charcoal-black to black-brown outer crust with deep cracking.
A cut true conk should show a dense rust-brown to yellow-brown interior rather than a soft cap-and-stem mushroom structure.
Do not harvest by a fixed calendar alone. Conk appearance and growth are highly strain- and site-dependent, and the literature does not establish a universal evidence-based diameter or age that defines optimal harvest maturity.

Advanced notes

The black mass called chaga is a sterile conk made largely of fungal mycelium. It is not the sexual basidiocarp.
After the infected host dies, I. obliquus can form a thin, resupinate sexual basidiocarp beneath or through the bark. This is a different lifecycle stage and should not be modeled as another chaga flush.
Visible conks are a multi-year outcome. Studies have reported first conks roughly 3–5 years after inoculation/infection, with many inoculated trees taking longer or never producing a visible conk during the study window.
The 25–30 °C incubation value is for in-vitro mycelial culture/spawn work. It is not a validated field-temperature target for living birch trees or conk development.
Artificial mycelial culture can be produced much faster than a tree-grown conk, but the biological product and production process are not equivalent. Keep laboratory biomass cultivation distinct from living-tree conk cultivation.
Typical flush count, pin induction, pins-to-harvest timing, fruiting-room RH, fresh-air exchange, and CO₂ targets are not appropriate standard fields for living-tree chaga cultivation and should remain null rather than borrowing values from other mushrooms.

Practical tips

Treat chaga as a managed living-tree forestry crop, not as a bag or exposed-block fruiting mushroom.
Use authenticated I. obliquus culture and trace the strain. Field studies show that strain choice materially affects infection and conk formation.
In Finnish field trials, inoculation near the beginning of the thermal growing season improved the probability of successful infection and conk development.
Plan for multi-year monitoring. Record infection/conk status annually instead of expecting a short production cycle.
Record host species, trunk diameter, tree health, inoculation date and position, site conditions, and conk dimensions; these factors are important for comparing outcomes.
For commercial field trials, research supports considering low-productivity or set-aside birch stands because conk formation is slow and infection reduces timber quality.

Warning signs

Host tree weakening or breakage
I. obliquus is a canker-rot pathogen. Infection decays heartwood and can reduce structural integrity, increasing the risk of stem breakage and host decline.
The host tree has died
Host death changes the lifecycle. The black conk is associated with the living-host stage; after death, the fungus may form its sexual basidiocarp under the bark. Do not treat this as a normal new flush.
Swelling, cracks, or decay without a confirmed conk
Visible bark symptoms are not specific enough to prove successful I. obliquus infection. Other decay fungi can cause similar signs; use authenticated inoculum and confirm uncertain cases.
Charcoal-black cracked surface
A hard black, deeply cracked outer crust is a normal characteristic of chaga and should not be classified as mold contamination by color alone.
Uncontrolled inoculation outside a managed stand
Chaga cultivation intentionally introduces a tree pathogen and can increase its local occurrence. Inoculate only trees you are authorized to manage and follow applicable forestry, plant-health, and land-use rules.
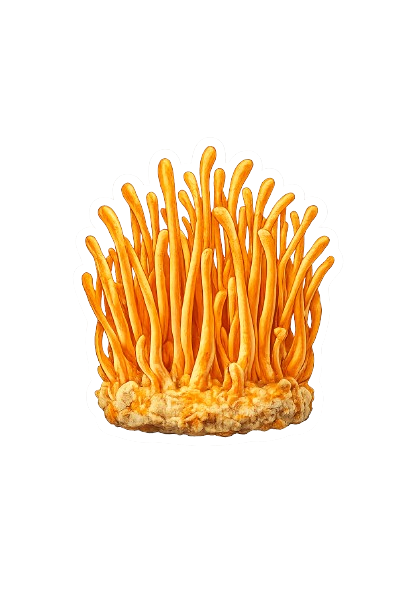
Cordyceps

Cordyceps

AdvancedVerified
Cordyceps militaris

An entomopathogenic ascomycete grown commercially in sterile jars on supplemented rice or other validated cereal substrates. Cordyceps militaris needs an aseptic workflow, a dark spawn run, and then timed light with controlled humidity and gas exchange to form its orange club-shaped stromata, making it an advanced indoor crop rather than a typical sawdust-block mushroom.

Cultivation profile

Ranges are estimates and vary with strain, substrate, block size, spawn rate, and fruiting setup.

Incubation

Temperature
18–22 °C ideal18–25 °C allowable
Humidity
65–70% room RH
Light
None
CO₂
Colonization
7–14 daysTypical 10 days

Pinning & fruiting

Temperature
18–22 °C ideal16–23 °C allowable
Humidity
85–95% ideal RH70–95% allowable RH
Light
Bright indirect
Fresh air
Moderate
CO₂
Preferred <800 ppm
Induction to pins
7–15 daysTypical 12 days
Pins to harvest
20–26 daysTypical 25 days

Substrate

PrimarySterilized brown rice with a measured nutrient solution is the best-supported primary artificial-cultivation substrate. Published protocols commonly use small sterile jars or bottles rather than open blocks.
SecondaryRice combined with silkworm pupae, pupal powder, or related insect-derived nutrient material is documented in Cordyceps militaris cultivation research. Use only a validated sterile formula because nutrient balance strongly affects growth and fruiting.
SecondaryOther cereal substrates, including white rice, wheat, corn and sorghum, can support cultivation in validated formulations. Performance varies with strain, grain, supplementation, moisture and container geometry, so do not assume they perform identically to brown rice.

Harvest cues

Harvest-stage stromata should be well developed, firm, club-shaped and characteristically deep orange rather than remaining as pale undifferentiated mycelium.
The fertile upper region becomes visibly granular as perithecia develop. This surface texture is a stronger maturity cue than harvesting only by a fixed calendar day.
Harvest before substantial darkening, drying, collapse or obvious tissue deterioration. Use morphology and firmness together with the expected production window.

Advanced notes

Healthy Cordyceps militaris commonly begins with white mycelium during dark colonization. After the light phase starts, the culture normally develops pink-to-orange pigmentation before and during stroma formation; orange coloration by itself is not contamination.
Light is part of the fruiting program, not merely visibility for the grower. A common technical target is roughly 800–1000 lux for 10–12 hours per day after colonization, while published systems range from about 500 to 1750 lux depending on stage and protocol.
A culture that colonizes well can still lose fruiting competence after repeated subculture. Published degeneration studies show progressive loss of normal fruiting in serially transferred strains, so maintain a validated fruiting stock and avoid unnecessary generations of transfer.
Cordyceps jar production is usually managed as one primary stroma crop or harvest window rather than oyster-style repeated flushes. The current Guide should therefore not invent a flush count, rest interval, or automatic second-flush schedule.
Cordyceps requires filtered, controlled gas exchange, but it should not inherit the aggressive fresh-air guidance used for oyster mushrooms. Modern systems regulate CO2 with ventilation, while classic physiology work found that excessive aeration can suppress normal stromatal development.

Practical tips

Treat the grain medium as a laboratory-style sterile crop. Sterilize the filled containers, cool them fully, and inoculate with clean culture or liquid spawn using aseptic technique; contamination at this stage can ruin the entire batch.
Keep newly inoculated jars in darkness during spawn run, around the validated incubation temperature and room-humidity range, until the substrate is fully colonized with healthy white mycelium.
After full colonization, begin a controlled daily light cycle instead of exposing the jars continuously. Common production protocols use about 10–12 hours of light per day and watch for the normal white-to-pink/orange transition before primordia develop.
Raise room humidity for primordia and stroma development, but avoid persistent free water, heavy lid condensation dripping onto the culture, or wet stagnant surfaces. Control humidity through the room or chamber rather than repeatedly opening and spraying sterile jars.
Provide filtered gas exchange and monitor the room rather than frequently opening individual containers. A modern small-scale protocol targeted about 800 ppm CO2, but published systems differ, so treat that as a practical target rather than a universal species maximum.
Use a culture known to fruit reliably, record transfer generation, and replace production cultures that repeatedly colonize without normal pigmentation, primordia or stromata after environmental conditions have been verified.
Do not apply oyster-style whole-block soaking or routine rehydration between 'flushes.' Sterile Cordyceps jar culture is normally managed as one primary production cycle; opening and soaking the substrate adds contamination risk and is not a standard repeat-crop procedure.

Warning signs

White cottony mold spreading over orange stromata
White Cordyceps mycelium is normal before the light/pigmentation phase. After orange stromata have formed, however, a new cottony white layer that spreads over the fruiting bodies—especially when tissue turns grey or dies—is consistent with documented mycoparasitic disease. Isolate the affected container and avoid opening it in the production room.
Wet, slimy substrate or sour/off odor
Excess liquid, slimy grain, abnormal wet breakdown or a sour/off odor is not a normal Cordyceps fruiting response and is consistent with bacterial or mixed contamination in sterile grain culture. Isolate the container instead of trying to rescue it by increasing misting or ventilation.
Culture stays white after the light phase begins
Healthy colonized culture normally develops pink-to-orange pigmentation after the fruiting light program begins. If it remains uniformly white for several days, verify light intensity and photoperiod, temperature, strain identity and culture age. Persistent lack of pigmentation is a cultivation warning, not proof of contamination by itself.
Primordia stall or stromata fail to develop
Check the full environment—light, temperature, humidity, gas exchange and culture competence—rather than changing a single variable blindly. Repeated failure under verified conditions can indicate strain degeneration or a non-fruiting culture even when colonization appears vigorous.
Stromata darken, dry or begin to collapse
Darkened dry tips, loss of firmness or collapsing tissue indicates that the crop is drying, aging or moving beyond the preferred harvest condition. Check chamber humidity and harvest mature firm orange stromata before quality declines further.
Snow fungus

Snow fungus

Intermediate2–3 flushesVerified
Tremella fuciformis · White jelly fungus · Silver ear mushroom

A white, translucent jelly fungus cultivated commercially in dual culture with a compatible Annulohypoxylon companion. It prefers warm conditions, high humidity, low diffuse light, and carefully managed ventilation; its two-fungus biology makes cultivation more specialized than standard oyster-mushroom blocks.

Cultivation profile

Ranges are estimates and vary with strain, substrate, block size, spawn rate, and fruiting setup.

Incubation

Temperature
23–25 °C ideal18–26 °C allowable
Humidity
70–75% room RH
Light
None
CO₂
Colonization
7–17 days

Pinning & fruiting

Temperature
22–24 °C ideal
Humidity
85–95% RH
Light
Low indirect
Fresh air
High
CO₂
Induction to pins
15–20 daysTypical 16 days
Pins to harvest

Substrate

PrimaryPrimary industrial-style substrate: cottonseed hull supplemented with wheat bran and gypsum. A recent production study used an 85:14:1 ratio at 58–60% substrate moisture.
SecondarySupplemented sawdust with rice or wheat bran is a well-established alternative; published Taiwanese protocols use roughly 60% substrate moisture.

Harvest cues

Harvest when the fruiting body is fully developed into broad, ruffled, leaf-like lobes rather than compact early globules.
Fresh mature fruiting bodies should remain white to milky white, semi-translucent, and firm-gelatinous.
Choose intact, well-developed clusters before obvious yellowing, browning, softening, or structural collapse begins.

Advanced notes

Standard synthetic-block cultivation relies on a compatible Annulohypoxylon companion; Tremella alone is inefficient at exploiting lignocellulosic substrate for reliable fruiting.
Modern molecular work identifies Annulohypoxylon stygium as the principal industrial companion in Fujian, although older cultivation literature often names A. archeri (formerly Hypoxylon archeri).
Yellowish-brown exudate near white mycelial globules can be a normal pre-primordia sign in mixed culture. Excess accumulation should be drained, but the color alone is not proof of contamination.
Pure T. fuciformis mycelium grows much more slowly than its Annulohypoxylon companion; a short commercial block cycle does not mean Tremella itself is a fast-growing mycelium.
No reliable universal fruiting CO₂ ppm ceiling was found. Published systems use very different ventilation and CO₂ strategies, so oyster-mushroom thresholds should not be reused.
Second and third flushes are reported, but the reviewed sources do not establish a universal soak or rehydration protocol between flushes.
The reviewed sources specify ambient RH and ventilation but do not establish a universal rule for spraying primordia or fruit bodies directly. Use setup-appropriate humidification and avoid persistent waterlogging.

Practical tips

Start with verified mixed spawn containing T. fuciformis and a compatible Annulohypoxylon culture; companion identity and compatibility strongly affect fruiting.
Keep the two-fungus spawn balanced and well mixed. Overgrowth or aging of the faster Annulohypoxylon component can reduce uniform Tremella fruiting.
For primordia formation, favor about 22–24 °C; in a controlled trial, 26 °C produced no primordia after 35 days.
Increase ventilation as primordia develop. Published methods differ in exact schedules, but they consistently call for more air exchange during fruiting than during spawn run.
Provide low, diffuse light during fruit-body development; published protocols use roughly 50–600 lux or 8–10 hours of diffused light.
Maintain high ambient humidity while avoiding continuously waterlogged fruiting tissue or standing water around the block opening.
If yellow-brown exudate pools around the inoculation site, drain the excess while preserving normal surface moisture.
Inspect the culture daily for primordia progress, spawn imbalance, green mold, drying, and changes in fruit-body color or texture.

Warning signs

Spreading green mold
Green mold contamination is documented in T. fuciformis production, and Trichoderma can damage both Tremella and its companion fungus. Isolate affected bags and follow the cultivation area's contamination protocol.
Aged or heavily browned spawn with stalled performance
In liquefied-spawn research, over-aged browned inoculum was associated with smaller, malformed, or failed fruiting. Browning by itself is not a universal contamination diagnosis in every spawn format; evaluate age, vigor, abnormal growth, and production performance together.
No primordia under warm fruiting conditions
If white globules form but primordia do not progress, check fruiting temperature first. In one controlled study, 26 °C produced no primordia after 35 days, while 22–24 °C performed best.
Primordia stop developing or collapse
Primordia abortion is associated with poor control of temperature, moisture, ventilation, or light. Stabilize the fruiting environment and increase ventilation carefully rather than making abrupt changes.
Excess yellow-brown exudate pooling
Some yellow-brown exudate can be normal before primordia, but excessive pooling should be drained. Judge contamination by abnormal growth, odor, and culture performance—not exudate color alone.
Fresh clusters yellow, brown, or soften quickly after harvest
Fresh T. fuciformis deteriorates rapidly because of its very high water content. Yellowing, browning, softening, or decay after harvest indicates quality loss and should not be treated as normal fresh appearance.
Turkey tail

Turkey tail

EasyGood for beginners2–3 flushesVerified
Trametes versicolor

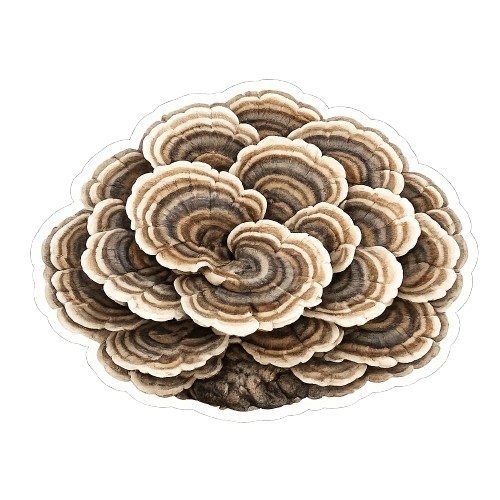
A thin, leathery bracket mushroom with concentric bands of naturally variable color. It colonizes lignocellulosic blocks reliably around 25 °C, then benefits from high humidity, indirect light, and regular ventilation; bracket development is slower and more variable than substrate colonization.

Cultivation profile

Ranges are estimates and vary with strain, substrate, block size, spawn rate, and fruiting setup.

Incubation

Temperature
23–27 °C ideal20–30 °C allowable
Humidity
70–85% room RH
Light
None
CO₂
Colonization
15–29 daysTypical 20 days

Pinning & fruiting

Temperature
23–27 °C ideal10–27 °C allowable
Humidity
85–95% RH
Light
Indirect
Fresh air
Moderate
CO₂
Induction to pins
5–20 daysTypical 14 days
Pins to harvest
12–27 daysTypical 18 days

Substrate

PrimaryPrimary: Sterilized hardwood sawdust with modest cereal-bran supplementation. Published bag trials successfully used sawdust with rice bran or wheat bran.
SecondarySecondary: Sterilized sawdust blended with rice husk and a modest amount of wheat bran. Sawdust–rice-husk mixtures produced successful fruiting and strong biological efficiency in controlled trials.
SecondarySecondary, long-cycle method: Hardwood logs support natural bracket formation, but colonization and first fruiting take months rather than the weeks typical of sterilized blocks.

Harvest cues

Harvest when the fruit bodies have developed into fully expanded, thin fan- or shelf-shaped brackets, often overlapping in tiers.
Look for well-defined concentric zones on the velvety upper surface. Exact colors vary strongly with strain, age, light, season, and growing conditions, so color alone is not a fixed maturity target.
Check the porous underside: it is whitish while developing and may shift toward buff as the fruit body reaches maturity.

Advanced notes

Do not apply block timing to logs. Sterilized bags can fully colonize in roughly 2–4 weeks, while a controlled 2026 chestnut-log trial averaged about 327 days to first fruiting.
Gray, brown, bluish, greenish, reddish, cream, and whitish bands can all occur naturally on Turkey Tail caps. Normal concentric cap coloration must not be classified as contamination by color alone.
The substrate may colonize comparatively quickly while the brackets themselves mature slowly. Small-scale block guidance reports that mature brackets can take several weeks and sometimes 1–2 months depending on temperature.
Expect multiple harvests rather than one fixed flush. Controlled studies commonly produced two flushes, and one recent bag trial recorded three pickings; the second flush was lower yielding in the Indian study.
Published cultivation studies reviewed for this profile do not establish a reliable species-specific fruiting CO₂ ppm ceiling. Use regular ventilation and crop morphology instead of borrowing a ppm target from oyster mushrooms.

Practical tips

After full colonization, provide regular indirect or diffuse light. Successful studies used about 8–12 hours of light per day; avoid direct sun on the block or fruit bodies.
Keep ambient humidity high, especially during pin initiation. Prevent the exposed fruiting surface from drying while avoiding stagnant, continuously waterlogged conditions.
Provide regular fresh-air exchange during fruiting. One successful controlled protocol ventilated the cropping room for about 30 minutes three times per day; the exact schedule should be adapted to the room rather than treated as a universal requirement.
If using a humidity tent or small chamber, mist the tent, walls, or surrounding air as needed to maintain humidity instead of keeping developing brackets continuously soaked.
For shelf-like morphology, horizontal side slits in a colonized bag are a practical fruiting option. Top-fruiting can also work but tends to produce a rosette-like form.
Use bracket development and pore-surface maturity to decide when to harvest. Temperature, strain, substrate composition, and fruiting setup can shift timing substantially.

Warning signs

Expanding green mold on the substrate
Dense competitor growth that develops green sporulation and spreads across the substrate is consistent with Trichoderma-type green mold. Isolate affected blocks and review sanitation. Turkey Tail's normal multicolored bands occur on formed brackets and should not be mistaken for spreading green powder on the substrate.
Dry, hardening, or stalled primordia
Primordia that dry, harden, or stop expanding can indicate insufficient or unstable humidity. Restore high ambient RH without soaking the developing brackets, and maintain regular air exchange.
White masses do not flatten into brackets
If thick creamy growth persists without developing into fan- or shelf-shaped brackets, re-check fruiting temperature, high humidity, indirect light, and ventilation before assuming contamination.

Wood

Maitake

Maitake

Advanced1–2 flushesVerified
Grifola frondosa · Hen of the woods

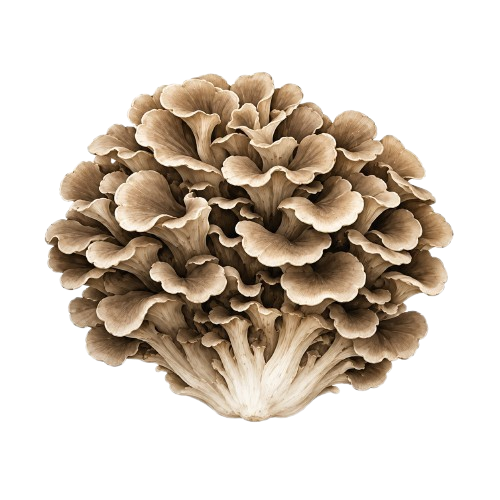
Maitake is a wood-decaying gourmet mushroom that forms layered rosettes of fan-shaped fronds. Indoor production is usually done on sterilized, supplemented hardwood sawdust and is an advanced crop: full colonization is followed by a separate maturation stage before cool, humid, low-CO₂ fruiting.

Cultivation profile

Ranges are estimates and vary with strain, substrate, block size, spawn rate, and fruiting setup.

Incubation

Temperature
20–25 °C ideal
Humidity
60–70% room RH
Light
None
CO₂
Recommended max 3000 ppm
Colonization
30–55 daysTypical 35 days

Pinning & fruiting

Temperature
16–20 °C ideal
Humidity
85–95% RH
Light
Low
Fresh air
High
CO₂
Preferred <700 ppmRecommended max 1000 ppm
Induction to pins
8–11 daysTypical 10 days
Pins to harvest
9–15 daysTypical 12 days

Substrate

PrimaryPrimary — Sterilized hardwood sawdust, especially oak, supplemented with wheat or rice bran and/or cereal grains. This is the standard substrate class for commercial bag and bottle cultivation.
SecondarySecondary — Corn-cob-rich lignocellulosic mixes supplemented with wheat bran can replace some or all sawdust. One optimized research formula used mostly corn cob with a small amount of rice straw, wheat bran, and calcium carbonate.

Harvest cues

Inspect the developing cluster daily once distinct fan-shaped pilei are expanding.
Harvest when the pale or white marginal growth line at the pileus edge disappears; recent industrial cultivation studies use this as a maturity criterion.
The cluster should be fully differentiated into overlapping, outward-extending fronds rather than remaining an undifferentiated brain- or cauliflower-like mass.
Harvest before the cluster becomes overmature, fronds lose firmness or droop, and heavy spore release begins.
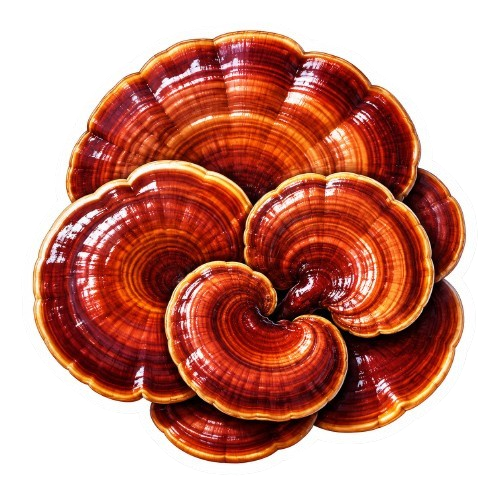
Advanced notes

Do not equate full substrate colonization with fruiting readiness. Some bag systems reach full colonization in about 30–35 days but then require a separate maturation period lasting additional weeks while a dense surface mycelial mat develops and pigments.
Orange-brown or rust-colored surface pigmentation and metabolite droplets can be normal during Maitake block maturation. Judge contamination by spreading foreign colonies, abnormal odor, tissue collapse, or slime—not brown/orange coloration alone.
A 10 °C, 24-hour cold shock was essential in one tropical Colombian production system, but recent industrial bag studies induce primordia around 18–20 °C without such an extreme shock. Treat strong cold shock as strain- and system-specific, not universal.
Maitake setpoints change during development. Recent protocols use roughly 18–20 °C and 85–90% RH for induction, 16–18 °C with CO₂ at or below about 1500 ppm for primordia, and very humid conditions with CO₂ at or below about 1000 ppm during pileus differentiation. The Guide's single fruiting range is a simplified working window.
Commercial synthetic-log production is often managed as one main crop. A second crop is biologically possible and was obtained 15–20 days later in one controlled study, but it is not guaranteed and may not be the preferred commercial strategy.
Spent coffee grounds supported Maitake mycelial growth in one tested system but did not produce fruiting bodies. Do not present spent coffee grounds alone as a validated Maitake fruiting substrate.

Practical tips

After full colonization, wait for the strain's characteristic mature surface mat and pigmentation before forcing fruiting; inducing an immature block can reduce or delay primordia formation.
Provide strong fresh-air exchange during fruit-body development. Aim for about 700 ppm CO₂ or lower when the setup can achieve it, and keep mature frond development at or below about 1000 ppm.
Use low diffuse cultivation light after colonization. Modern bag protocols commonly use roughly 200–400 lux for part of the day; avoid direct sun and heat loading.
Keep the fruiting room highly humid while avoiding standing water or continuously wet fronds. Prefer controlled ambient humidification; direct misting should be treated as setup-dependent rather than a mandatory Maitake practice.
Once strong primordia form, expose only the intended fruiting zone. Commercial bag systems often cut openings around the largest, darkest, most consistent primordia instead of stripping the whole block.
Use morphology rather than a fixed calendar date for harvest. The fading/disappearance of the pileus-edge growth line is a strong maturity cue.
Use properly sterilized supplemented substrate and clean inoculation/handling practices. Maitake has a long crop cycle, so competitors have substantial time to establish if sanitation is weak.

Warning signs

Gray-green mold spreading over the block or fruiting area
A spreading grayish-green colony accompanied by yellowing or wilting Maitake tissue, yellow droplets, and inhibited growth is consistent with documented blue-mold disease. Isolate the affected block and follow the cultivation area's contamination protocol. Normal orange-brown Maitake maturation pigment by itself is not this symptom.
Yellow slime followed by soft, putrid tissue
Yellow plasmodial growth that spreads onto the fruiting body and is followed by soft, rotten, slimy tissue is a serious disease sign documented in cultivated Maitake. Isolate affected material and review irrigation, surface wetness, sanitation, and cross-contamination controls.
Abnormal rotten odor, collapse, or wet deterioration
A sour or putrid odor, collapsing tissue, unusual wet lesions, or spreading decay should not be treated as normal Maitake maturation. Isolate the block and inspect for bacterial, fungal, or slime-mold contamination.
Primordia dry, shrink, or stop developing
Stalled or drying primordia usually justify checking relative humidity, block moisture, airflow intensity, and temperature. Restore a stable humid environment without soaking the fruiting body or waterlogging the substrate.
Poor frond expansion or weak pileus differentiation
When Maitake does not progress cleanly from compact primordia into differentiated fan-shaped fronds, first verify fresh-air exchange and CO₂. Fruiting studies use progressively lower CO₂, reaching about 1000 ppm or below during pileus differentiation.
Fully white block fails to form primordia after induction
A fully colonized block can still be physiologically immature. If contamination is absent and conditions are otherwise correct, verify that the block completed its post-colonization maturation and developed the expected surface mat/pigmentation before fruiting induction.
Fronds are drooping and the cluster is entering heavy spore release
The preferred fresh-harvest window is closing or has passed. Harvest earlier on the next crop, using full frond differentiation and disappearance of the pileus-edge growth line as the primary maturity cues.
Nameko

Nameko

Advanced2 flushesVerified
Pholiota nameko

A cool-fruiting wood-decay mushroom that forms compact amber-brown caps with a naturally glossy, gelatinous coating. Nameko is typically cultivated on sterilized, supplemented sawdust in bottles or blocks and needs sustained high humidity plus tight CO₂ control during fruiting, making it better suited to experienced growers than beginner oyster-type crops.

Cultivation profile

Ranges are estimates and vary with strain, substrate, block size, spawn rate, and fruiting setup.

Incubation

Temperature
20–25 °C ideal15–30 °C allowable
Humidity
80–85% room RH
Light
None
CO₂
Colonization
14–50 daysTypical 30 days

Pinning & fruiting

Temperature
12–18 °C ideal7–18 °C allowable
Humidity
93–96% ideal RH88–100% allowable RH
Light
Low
Fresh air
High
CO₂
Preferred <1000 ppmRecommended max 2000 ppm
Induction to pins
7–10 daysTypical 8 days
Pins to harvest
5–6 days

Substrate

PrimarySterilized broadleaf/hardwood sawdust supplemented with bran or other validated cereal nutrients. This is the best-supported standard substrate for modern bottle or block cultivation.
SecondaryValidated sawdust-and-corn-stalk formulations can replace part of the wood fraction. One peer-reviewed trial performed especially well with a 38% sawdust + 38% corn-stalk base plus supplements.
SecondaryProperly formulated pine or other documented conifer sawdust can also work when supplemented. Broadleaf sawdust remains the preferred general recommendation.
SecondaryValidated formulations using peanut waste, almond shell, wheat straw or wheat stalk with suitable supplementation can produce Nameko. Treat these as tested recipes rather than evidence that arbitrary agricultural waste is interchangeable.

Harvest cues

Harvest when the veil on most mushrooms in the cluster is beginning to break or has just broken.
The caps should still be partly closed or cupped. Harvest before they fully unfold or flatten.
Healthy harvest-stage Nameko should retain its characteristic amber-brown appearance and naturally glossy, gelatinous cap surface.

Advanced notes

Cultivated Nameko is treated as Pholiota microspora by Neda (2008), modern Japanese cultivation genetics and NCBI, while Index Fungorum currently retains Pholiota nameko and some recent genomic literature separates the two. Keep the project name stable unless the repository adopts a formal taxonomy authority.
Full visible colonization is not always the end of the pre-fruiting cycle. A Korean bottle-cultivation study reported an optimum post-culturing period of about 50 days before induction; keep this maturation/consolidation concept separate from colonizationDays.
The slippery gelatinous coating is a defining normal Nameko trait. A clear/glossy gel layer on intact amber-brown caps is not contamination by itself.
Most independent cultivation evidence supports cool fruiting around 12–18 °C. A 2025 ZZ1 strain protocol reported fruit-body induction at 23 °C and 70–80% RH; treat that as strain/system-specific rather than widening the generic target.
Removing or scratching the aged surface mycelium can help trigger primordia in bottle/block systems. Use a clean tool and do not aggressively excavate the substrate.
Two crops are supported by cultivation evidence, but the reviewed sources do not establish one universal rest interval or soaking duration between flushes. Restore moisture according to block condition and the production method rather than hardcoding a single immersion recipe.

Practical tips

Run colonization in darkness within the strain-appropriate 20–25 °C range and watch substrate temperature in dense or highly supplemented blocks.
During initiation, keep the exposed fruiting surface consistently moist. Nameko primordia are moisture-sensitive and can abort after the surface dries.
Provide low-intensity cultivation light during fruiting. Peer-reviewed systems used roughly 50–500 lux for about 12 hours per day.
Ventilate to keep fruiting CO₂ near or below 1000 ppm when practical. Values below 2000 ppm have been used experimentally, but around 1000 ppm is the better-supported quality target.
Use enough fresh-air exchange to control CO₂ while replacing the humidity lost to ventilation. High airflow that dries the block surface can trade one problem for another.
If a fully prepared block is slow to pin, lightly disturb or scratch the upper mycelial surface with a clean tool where the cultivation method calls for it.
Once pins appear, inspect clusters daily. The interval from pins to harvest can be only about 5–6 days under controlled conditions.
After harvest, remove damaged remnants and restore substrate/surface moisture as needed. Do not apply a fixed soak duration unless the specific bottle/block protocol supports it.

Warning signs

Expanding green mold or green sporulation
Trichoderma contamination is documented to reduce Nameko yield. Treat expanding green colonies or powdery green sporulation on the substrate as contamination; isolate the affected unit and follow the cultivation area's contamination protocol.
Sour or rotten odor with soft, discolored tissue
Nameko caps are naturally slippery, so slickness alone is not evidence of rot. A sour/rotten odor together with collapsing, unusually soft or spreading discolored tissue is not a normal gelatinous cap trait; isolate the unit and inspect it as possible bacterial or competing-microbe contamination.
Dry surface, shriveled pins, or primordia aborting
Nameko is highly moisture-sensitive during initiation. Restore fruiting humidity and surface moisture while avoiding standing water or continuously drenched fruit bodies.
Long stringy stems with undersized caps
Excess CO₂ is a documented cause of poor Nameko morphology and reduced performance. Increase fresh-air exchange and verify that fruiting CO₂ is being held near the target without drying the crop.
Caps fully unfolded or flattening
The preferred harvest window is closing or has passed. Pick clusters earlier, around veil break and before the caps fully open, for the intended Nameko morphology.
Shiitake

Shiitake

Intermediate2–4 flushesVerified
Lentinula edodes · Oak mushroom

A wood-decaying mushroom typically grown on sterilized supplemented hardwood sawdust blocks or hardwood logs. Shiitake colonizes at mild-to-warm temperatures, but it needs a distinct browning and physiological-maturation stage before fruiting. Fruiting is cooler, humid, lit, and well ventilated, and the longer maturation period makes Shiitake more process-sensitive than fast-growing oyster mushrooms.

Cultivation profile

Ranges are estimates and vary with strain, substrate, block size, spawn rate, and fruiting setup.

Incubation

Temperature
23–25 °C ideal20–28 °C allowable
Humidity
50–70% room RH
Light
None
CO₂
High CO₂ tolerated
Colonization
20–35 daysTypical 30 days

Pinning & fruiting

Temperature
10–20 °C ideal5–25 °C allowable
Humidity
85–90% ideal RH80–95% allowable RH
Light
Indirect
Fresh air
High
CO₂
Preferred <1000 ppmRecommended max 1500 ppm
Induction to pins
2–7 daysTypical 5 days
Pins to harvest
4–8 daysTypical 6 days

Substrate

PrimarySterilized hardwood sawdust is the main modern commercial substrate, commonly using suitable broadleaf woods such as oak or eucalyptus and supplementation with wheat bran, rice bran, millet, rye, corn, or other validated cereal nutrients. Synthetic-log formulations commonly target roughly 60% substrate moisture before sterilization.
SecondaryNatural hardwood logs are the traditional Shiitake substrate. Appropriate broadleaf woods, especially oak-family and other proven hardwoods, can support high-quality production, but log colonization and forcing follow a much longer biological timetable than synthetic blocks.
SecondaryValidated synthetic formulations can combine sawdust with corncob, straw, sugarcane bagasse, or other lignocellulosic residues plus suitable supplements. Treat these as formulated and properly heat-treated systems, not as a generic untreated straw substrate.

Harvest cues

Harvest while the cap margin is still slightly rolled inward. A commonly cited commercial stage is when the cap is roughly 60–70% expanded.
Pick before the pileus becomes fully flat or strongly upturned. Waiting for complete opening reduces the compact commercial form and moves the mushroom beyond the preferred fresh-harvest stage.
Choose mushrooms with firm, intact caps and stems and normal Shiitake coloration. Soft, slimy, water-soaked, badly browned, or foul-smelling tissue is not a normal maturity cue.

Advanced notes

Full white colonization is not the same as fruiting readiness. Synthetic Shiitake production has a separate browning or physiological-maturation stage that commonly adds about 30–90 days, depending strongly on cultivar and management. Keep this separate from the 20–35 day colonization field.
A firm brown outer film or bark-like surface on a mature Shiitake block is a normal developmental feature, not contamination by itself. Warning signs are foreign growth such as expanding green sporulation, abnormal soft rot, or other tissue breakdown.
Fruiting temperature is strongly strain dependent. Embrapa describes high-temperature strains around 15–25 °C, medium-temperature strains around 10–20 °C, and low-temperature strains around 5–15 °C. The Guide's combined temperature range is therefore a species-level envelope, not a universal setpoint for every cultivar.
The numeric timing in this profile is centered on synthetic sawdust blocks. Natural hardwood logs can require many months of spawn run before they are ready to fruit, and log-forcing schedules should not be inferred from the block timing fields.
Cold-water soaking is widely used to induce or re-induce Shiitake fruiting, but published protocols range from short cold soaks to many hours, and modern water-injection methods can also work. Block size, strain, water temperature, moisture loss, and production system determine the appropriate method; there is no single universal soak duration.
Second and later flushes usually require a recovery/rest period and restoration of block moisture before another induction. Published synthetic-block programs commonly produce two to four flushes, with later yield and economic value depending on block vigor and management.

Practical tips

Do not move a newly white, fully colonized block directly to fruiting. Wait for the cultivar's required browning, coat hardening, and physiological maturity before induction.
Apply cold-water shock, soaking, water injection, or another validated induction method only after the block is mature. Premature induction can reduce uniformity and yield.
Keep fruiting humidity high, but avoid prolonged free water, stagnant wet surfaces, and continuously soaked mushrooms. Very wet surfaces combined with warm conditions can favor bacterial problems.
Provide diffuse cultivation light and strong fresh-air exchange during fruiting. Shiitake needs light for normal cap development, while accumulated CO₂ can cause elongated stems, small caps, and poor morphology.
Inspect developing mushrooms at least daily near maturity and harvest while cap margins remain slightly inrolled rather than waiting for the caps to flatten completely.
After a flush, allow the block to recover and assess moisture before re-induction. Rehydrate according to the actual block condition and the farm's validated protocol rather than soaking automatically on a fixed calendar.

Warning signs

Expanding green mold or green powder on the block
Green, powdery sporulation spreading independently over the substrate is not normal Shiitake browning and is consistent with green-mold contamination such as Trichoderma. Isolate the affected block and follow the cultivation area's contamination protocol.
Soft, slimy, water-soaked, or brown-rotting tissue
Softening, slime, wet lesions, deformation, brown rot, or abnormal odor can indicate bacterial or other microbial deterioration. Isolate affected mushrooms or blocks and review sanitation, temperature, humidity, and surface-wetness control.
Thick or elongated stems with undersized caps
This morphology commonly indicates insufficient fresh-air exchange and excessive CO₂ around developing Shiitake. Increase ventilation and verify that the fruiting room is not accumulating stale air.
Pale caps, long stems, or weakly formed mushrooms
Insufficient cultivation light can produce pale fruit bodies, excessive stem elongation, and deformation. Verify adequate diffuse light and also check ventilation because stale air can compound abnormal morphology.
Dry, shriveled, stalled, or aborting primordia
Low relative humidity or inadequate block hydration can stop young Shiitake from developing. Restore appropriate humidity and moisture without saturating the substrate or leaving fruit bodies continuously wet.
Caps fully flat or margins strongly upturned
The preferred fresh-harvest window is closing or has passed. Harvest promptly when the target is firm Shiitake with a partly expanded cap and a margin that is still slightly rolled inward.

Compost

Button mushroom

Button mushroom

Intermediate3–5 flushesVerified
Agaricus bisporus · Champignon

The classic white form of Agaricus bisporus, normally harvested young with a rounded closed cap and intact veil. Unlike wood-growing oyster mushrooms, it is produced on selectively composted substrate with a casing layer and requires stage-specific control of temperature, humidity, water and CO₂, making it an intermediate crop.

Cultivation profile

Ranges are estimates and vary with strain, substrate, block size, spawn rate, and fruiting setup.

Incubation

Temperature
23–25 °C ideal20–28 °C allowable
Humidity
90–95% room RH
Light
None
CO₂
High CO₂ tolerated
Colonization
10–21 daysTypical 16 days

Pinning & fruiting

Temperature
15–18 °C ideal12–20 °C allowable
Humidity
80–90% RH
Light
None
Fresh air
Moderate
CO₂
Preferred <1000 ppmRecommended max 1200 ppm
Induction to pins
4–7 daysTypical 5 days
Pins to harvest
3–8 daysTypical 4 days

Substrate

PrimaryPrimary: selectively composted cereal-straw substrate, commonly based on wheat or similar straw with poultry or horse manure or other nitrogen sources plus gypsum/mineral conditioners, followed by proper pasteurization/conditioning and a moist casing layer. Button mushroom should not be treated as a raw-sawdust block species.
SecondarySecondary / Brazil-relevant: properly composted formulations using locally available lignocellulosic materials such as oat, Coast-cross, Tifton or related grass straws and sugarcane bagasse, combined with suitable nitrogen sources and conditioners. Brazilian studies support these materials as compost components; they are not direct raw-substrate recipes.

Harvest cues

Harvest at the closed button or closed-cup stage: the cap should remain rounded, compact and clearly closed rather than flattened or broadly opened.
For standard white-button grade, the partial veil should still be intact or only tightly stretched, with the gills not yet exposed. Once the veil tears and pink-to-brown gills become visible, the mushroom has moved beyond the classic button stage.
Pick while the cap is firm, white to creamy and fresh-looking, before softening, water-soaking, bruising or surface discoloration reduces quality. Commercial size targets vary; authoritative guides span roughly 2.5–5 cm cap diameter, so morphology should take priority over one fixed size.

Advanced notes

Button mushroom, cremini and Portobello are commercial forms of Agaricus bisporus rather than separate biological species. White button is usually a white/off-white cultivar harvested young and closed, while Portobello is commonly a brown form harvested larger and open. Keep their harvest copy separate even though much of the underlying cultivation biology is shared.
Standard commercial Agaricus production uses a casing layer after compost colonization. Casing is a porous, water-holding, relatively low-nutrient layer that supports gas exchange, beneficial microbiota and fruiting initiation; it is biologically distinct from the nutrient compost.
CO₂ management is strongly stage-specific. Elevated CO₂ is normal during spawn run and case run, while pinning requires a major CO₂ reduction through controlled ventilation. Do not reuse one static CO₂ target across the entire crop.
Agaricus bisporus does not require light to initiate or continue fruiting. Lighting may be used for worker visibility, but it is not a biological fruiting requirement.
Harvest maturity should be judged mainly by cap and veil morphology, not a single diameter. Official sources use different commercial size targets, roughly 2.5–5 cm, reflecting cultivar, market grade and production system.
Agaricus crops fruit in repeated breaks or flushes. Three to five flushes can be harvested commercially, but the first two usually provide most of the yield and later flushes decline progressively.
Commercial Button-mushroom water management is based on controlled casing irrigation and crop-stage moisture replacement. Whole-bed or whole-block soaking, as used with some wood-loving mushrooms, is not the standard rehydration method and should not be presented as the default.

Practical tips

Maintain an even spawn-run environment around the low-to-mid 20s °C and watch for metabolic heat inside the compost. Avoid hot spots: the substrate can become several degrees warmer than room air and excessive heat can damage mycelium and future crop performance.
Keep the casing evenly moist and porous. Apply water in controlled installments so the casing remains hydrated without becoming saturated or allowing excess water to run into the compost.
After case run, lower air temperature and CO₂ while increasing controlled ventilation. Current ICAR-DMR guidance centers pinning and cropping near 15–18 °C and roughly 800–1,200 ppm CO₂.
After watering, manage air movement and humidity so mushroom surfaces dry promptly. Caps that remain wet for several hours are substantially more vulnerable to bacterial blotch.
After twisting mushrooms out, remove degraded debris, refill harvest holes with clean casing where needed, and restore moisture according to crop load, casing condition and season.
Inspect frequently during each flush. For classic white-button quality, harvest while the caps are firm and the veil remains closed; development can accelerate quickly as market maturity approaches.
Keep spawning, casing, tools, workers and rooms clean. Agaricus production is highly vulnerable to carryover diseases and competitor molds spread by equipment, water, dust, people and pests.

Warning signs

Dense white growth turning green
Dense competing white mycelium followed by green sporulation, nonproductive casing patches, browning or lysis of small pins, or green growth on fruit bodies is consistent with Trichoderma green mold. Isolate affected material/areas and follow the cultivation site's contamination protocol.
Yellow-to-brown wet-looking cap lesions
Pale-yellow spots that deepen to golden or chocolate brown, sometimes with water-soaked gray or yellow-gray tissue underneath, are characteristic of bacterial blotch. Persistent cap wetness and splash spread strongly increase risk.
Globe-like deformities, split stems or fuzzy brown spots
Rounded masses of undifferentiated mushroom tissue, split stipes, or brown necrotic spots with a grayish fuzzy center can indicate dry bubble. Avoid splashing suspect fruit bodies; contaminated water, tools, people and pests can spread the pathogen.
Caps remain wet for hours after watering
Surface wetness lasting about 4–6 hours or longer after watering or condensation is a major bacterial-blotch risk. Adjust irrigation timing, humidity, ventilation and drying conditions without desiccating the casing.
Pinning stays weak after induction
If the casing is colonized but pins remain delayed or sparse, verify that temperature and CO₂ were actually reduced and that ventilation is removing accumulated crop gases. Agaricus bisporus primordia formation depends on the induction environment as well as casing biology.
Veil tearing and gills becoming visible
This is normal maturation, not contamination, but it means the mushroom is moving past classic white-button grade. Harvest promptly if the production target is a closed, tight button.
Portobello

Portobello

Intermediate2–4 flushesVerified
Agaricus bisporus · Mature brown button mushroom

Portobello is the mature, open-cap brown form of Agaricus bisporus — the same species as the white button mushroom and the brown crimini. It is grown on composted straw-and-manure substrate with a required peat-lime casing layer. Pinning is induced by lowering temperature and CO₂ after the casing is colonized. Portobello is harvested later than button or crimini, once the cap is large, open, and flat, yielding a firm, meaty mushroom valued for its intense flavor and gourmet use.

Cultivation profile

Ranges are estimates and vary with strain, substrate, block size, spawn rate, and fruiting setup.

Incubation

Temperature
23–25 °C ideal20–28 °C allowable
Humidity
85–95% room RH
Light
None
CO₂
High CO₂ tolerated
Colonization
10–18 daysTypical 14 days

Pinning & fruiting

Temperature
15–17 °C ideal14–20 °C allowable
Humidity
85–90% ideal RH80–95% allowable RH
Light
Low
Fresh air
High
CO₂
Preferred <1000 ppmRecommended max 1500 ppm
Induction to pins
7–14 daysTypical 10 days
Pins to harvest
5–10 daysTypical 7 days

Substrate

PrimaryPhase II compost is the primary nutrient substrate for Agaricus bisporus. It is prepared from wheat straw, horse and/or chicken manure, gypsum, and water through a two-phase composting process: Phase I (mixing, wetting, and microbial heating to ~80 °C) and Phase II (pasteurization at ~60 °C and conditioning at ~45 °C to remove ammonia and create a selective substrate). Phase III compost — fully colonized with spawn in bulk — is also widely used commercially. Proper compost quality is the single most important determinant of yield.
SecondaryA casing layer of sphagnum peat moss neutralized with ground limestone (calcium carbonate) is applied on top of the spawn-run compost. The casing is not a nutrient source — it acts as a water reservoir and provides a microenvironment where beneficial bacteria (especially Pseudomonas species) trigger the shift from vegetative mycelium to reproductive fruiting. Without a casing layer, A. bisporus will not produce mushrooms commercially. Peat-based casing does not require pasteurization because it is inherently free of mushroom pathogens.

Harvest cues

Harvest portobello when the cap is fully open and flat or nearly flat, with the veil broken and the gills exposed. This is the defining difference from button and crimini, which are harvested before the veil opens.
Portobello is harvested at a larger cap diameter than crimini — commonly 10–15 cm or more. The larger size and open form are what distinguish portobello as a product from the younger, closed-cap stages of the same species.
Pick mushrooms with firm, intact flesh and a clean, dry surface. Soft, slimy, water-soaked, or pitted caps indicate quality loss or disease and are past the optimal harvest window.
Portobello should display the characteristic dark brown coloration of the brown strain. Pale patches, yellow-brown blotches, or abnormal discoloration can indicate bacterial blotch or other surface disease.

Advanced notes

Portobello, crimini, and the white button mushroom are all Agaricus bisporus. The difference is strain color (white vs. brown) and harvest stage: button is picked unopened, crimini is a slightly larger unopened brown, and portobello is the fully open, mature brown form. They share the same cultivation system, substrate, and casing requirements.
Agaricus bisporus will not fruit commercially without a casing layer. The casing triggers the reproductive shift through a combination of physical, chemical, and microbiological mechanisms. Research shows that Pseudomonas species in the casing remove self-inhibitory volatile C8 compounds produced by the mycelium, enabling primordium formation. Sterile casing does not trigger pinning effectively.
Commercial A. bisporus substrate is produced in phases: Phase I (outdoor composting of straw, manure, gypsum, and water over 3–6 days), Phase II (pasteurization and conditioning to create a selective, ammonia-free substrate over 5–7 days), and Phase III (spawn run in bulk tunnels over 16–19 days at ~25 °C). Phase III compost is delivered ready to case. The total compost preparation cycle is separate from the in-room growing cycle.
Mushrooms appear in flushes (also called breaks or blooms) at approximately 7–8 day intervals. Commercial crops typically produce 2–4 flushes before the substrate is exhausted. The first flush is usually the heaviest. Each flush requires a brief recovery period with raised temperature and CO₂ before re-inducing pinning conditions.
Pinning is triggered by an environmental shift: lowering air temperature from ~25 °C to 15–17 °C, lowering CO₂ from >7500 ppm to 800–1000 ppm by introducing fresh air, and reducing relative humidity to ~85%. This shock signals the colonized mycelium to transition from vegetative growth to reproductive fruiting. The timing and uniformity of this shift directly affect pin set and yield.
The casing layer harbors a diverse microbiome that is essential for pinning. Research using next-generation sequencing shows that bacterial diversity in the casing increases after colonization by A. bisporus, and the casing microbiome composition influences mushroom quality and disease susceptibility. The casing microbiota also provides partial natural suppression of fungal diseases such as dry bubble.

Practical tips

Start with properly prepared Phase II or Phase III compost. Compost quality — moisture content (~62–68%), nitrogen level, absence of ammonia, and selectivity — is the foundation of a successful crop. Poor compost cannot be fixed by environmental management alone.
Apply the peat-lime casing at a uniform depth of approximately 3–5 cm over the fully colonized compost surface. Uniform depth ensures even mycelial growth into the casing and synchronized pinning. Avoid compacting the casing — a clumpy, open texture with small mounts and valleys improves aeration and pin distribution.
After casing, maintain spawn-run conditions (23–25 °C, high CO₂, 95% RH) for 7–10 days to allow mycelial colonization of the casing (case run). Then initiate pinning by lowering temperature to 15–17 °C, flushing with fresh air to drop CO₂ below 1000 ppm, and reducing RH to ~85%. The transition should be deliberate and controlled.
Water the casing in small, repeated applications rather than a single heavy soaking. The goal is to raise casing moisture to field capacity without leaching water into the underlying compost. After pins form, reduce watering to avoid damaging developing mushrooms. Ensure caps dry after watering to prevent bacterial blotch.
Harvest portobello by gently twisting the mushroom at the base and lifting it from the casing. Avoid pulling straight up, which can tear the casing and disturb adjacent pins. Fill the resulting hole with fresh casing material to prevent contamination and maintain surface uniformity.
Mushroom cultivation is highly sensitive to contamination. Sterilize or pasteurize all tools, trays, and equipment. Disinfect growing rooms between crops (cook-out with steam). Control flies and mites, which vector diseases. Personnel hygiene — clean clothing, foot dips, and hand sanitation — is essential, especially for green mold prevention.

Warning signs

Expanding green mold patches on compost or casing
Dense white mycelial growth followed by green sporulation on the compost or casing surface is consistent with Trichoderma aggressivum (green mold). This disease caused catastrophic crop losses in Pennsylvania in the 1990s. Infested areas become non-productive bare patches. Isolate affected trays, improve sanitation, and follow the farm's contamination protocol. Proper Phase II composting and hygiene are the primary controls.
Deformed, split, or bubbled mushrooms with fuzzy gray spots
Dry bubble, caused by Lecanicillium fungicola (formerly Verticillium fungicola), is the most common fungal disease of Agaricus. Symptoms include undifferentiated masses of tissue (bubbles), split or deformed stems, and fuzzy gray-brown spots on caps. The pathogen spreads via water splash, flies, and equipment. Isolate affected mushrooms immediately, salt or remove them, and increase sanitation. Lowering temperature and humidity can slow disease progression.
Yellow-brown to dark brown blotches on mushroom caps
Bacterial blotch, caused primarily by Pseudomonas tolaasii, produces pale yellow lesions that darken to golden brown or chocolate brown. The discoloration is superficial (2–3 mm deep) but renders mushrooms unmarketable. The disease is strongly linked to prolonged surface wetness — caps that remain wet for 4–6 hours or more are at risk. Control by drying caps after watering (raise temperature 2–3 °C, lower RH below 85%, maintain airflow), using chlorinated irrigation water, and avoiding temperature fluctuations that cause condensation.
Soft, wet, amorphous masses of tissue on the casing surface
Wet bubble, caused by Mycogone perniciosa, produces soft, wet, deformed masses instead of normal mushrooms. A white fuzzy coating may cover the affected tissue, which turns brown and releases liquid as it decays. The disease spreads rapidly via water splash and flies. Remove affected areas carefully, avoid splashing water, and maintain strict sanitation. Like dry bubble, the casing microbiome provides some natural suppression at low inoculum levels.
Fast-growing white-gray fluffy mold on the casing surface
Cobweb mold (Cladobotryum species) appears as a fast-growing, fluffy white-to-gray mycelium on the casing surface that can quickly cover pins and developing mushrooms. Affected mushrooms may develop soft brown rot. The mold thrives in high humidity and stagnant air. Increase ventilation, reduce humidity, remove affected areas, and apply approved fungicide if available. Good air circulation and surface drying are the primary preventive measures.
Overmature mushrooms with dark, liquifying gills and collapsed caps
Portobello harvested too late will have very dark, deliquescent gills and a soft, collapsed cap structure. The flesh loses firmness and the mushroom begins to autolyze. While not a disease, overmaturity reduces shelf life, culinary quality, and market value. Harvest promptly when the cap is fully open but the flesh is still firm and the gills are dark but intact.

Ready to grow for real?

Create a free account and track your own blocks, harvests, and sales with CoguPlanner.